

I went through my client’s WordPress websites because some of them got bloated over the years. So I just wanted to optimize and speed them up, and in doing so I came up with a really good process that I want to share with you today.
Those websites were loading between three and six seconds, and I got them down to about one second. A few of them loaded within 900 milliseconds on some of these tests.
The best news is that this WordPress speed optimization procedure doesn’t require that you switch to expensive hosting (though that will also help). I did all of this with basic, affordable shared hosting!
Let’s first dig into good rules of thumb for building WordPress websites to make sure that you don’t get in the same situation as me, where things aren’t running as smoothly because you overlooked how to speed up your site from the start.
Then we’ll go into the step-by-step tutorial that you can use to speed up your WordPress website.
Want all the steps on a single page? 👇
How to Speed Up WordPress
Benefits of a Fast Website
Speed matters, and the biggest reason is that it helps with SEO (search engine optimization). That means Google prefers fast websites and they’re more likely to send traffic your way because they always focus on the user experience.
This is especially important today since many users are visiting your website from a mobile phone, sometimes not having the luxury of a speedy WiFi connection.
If you have a slow-loading website, more people “bounce” off the website before it loads completely which equates to reduced conversions and less profit if you’re running a business.
Your website load time is far more significant if you operate an e-commerce website since the transaction happens online.
4 Speed Optimization Rules of Thumb
Reduce Image File Size
The biggest thing that you have control over that is not too technical is optimizing your images. For example, you don’t want to embed the highest resolution photos that get downsized on a smaller screen. I’ll go into more detail on that when we jump into the WordPress tutorial.
Limit WordPress Plugins
Keep every WordPress site that you have under 10 plugins installed. If you can get by with less than that, do it. Many of mine have only three or four.
It’s a beginner’s mindset to want to add all these nifty features and bells and whistles to your website.
Over the years, I’ve become a minimalist. Take away everything until you’re left with the bare essentials of what you need.
Limit 3rd-Party Embedded Content
An excellent example of this is YouTube videos. I’ve had a couple of pages on my client websites where we’ve embedded four or five videos on one page, and you can noticeably tell the difference when you refresh that page compared to the more basic ones.
There are ways to get around this suggestion, such as “lazy loading,” but once again, let’s start by not cramming everything we can onto a single page!
Upgrade Web Hosting
Yes, I said you don’t need to do this. And it’s true. However, this is primarily a business where you get your money’s worth.
To maximize your speed performance, you will need to go on higher-level hosting, which improves your server response time and download speeds. In addition, many upgraded hosting packages give you access to a CDN (content delivery network) which helps serve files more closely to the website visitor. I’m going to show you how to do that for free using Amazon AWS.
The thing is, it’s not usually necessary unless your traffic numbers increase or you see spikes of traffic that crash your site. For most small businesses and beginner blogs, you want to go through the tutorial below to improve your speed on a shared hosting package before pulling out your wallet.
Test Your Website Speed
Here’s the website that we’re going to optimize in this tutorial.
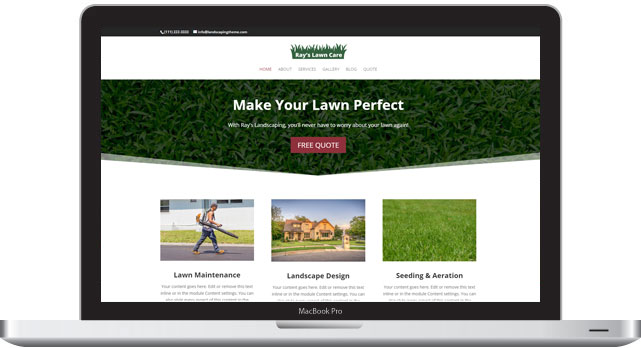
It’s using one of the most popular WordPress themes called Divi by Elegant Themes. They have a drag-and-drop system that makes it easy to create a professional layout like this without knowing much about code or design.

Divi Visual Builder
The #1 WordPress theme on the entire internet to design your website with drag-and-drop!
Buy NowI may earn a commission if you purchase using my links which helps support this website.
If there is one downside to that flexibility, it’s the performance compared to a hand-coded website where an experienced web developer optimizes every aspect.
There are two services I recommend to test speed – Google PageSpeed Insights and Pingdom.
You want to log your numbers first to see how much we improved it.
If we look at the score below, you can see it’s not that great. Google breaks it down into mobile and desktop, and we scored 15/100 on mobile and 61/100 on desktop!
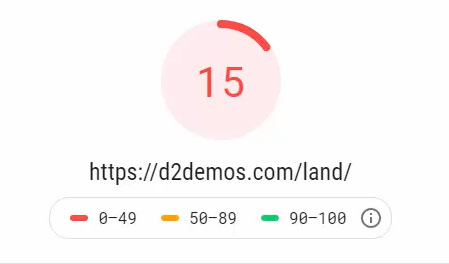
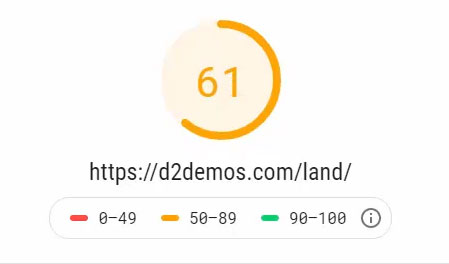
They provide you technical suggestions on how you can improve along with what you’ve done well.
You don’t need to be a web guru to implement their advice. We’re going to install WordPress plugins to help out with this process.
Let’s move onto the next service, Pingdom.
You can run this from a few locations, and since I’m in the US, I chose San Francisco.
Our performance grade here is 75, and they additionally show you the page size, which is 2.5 MB, and our load time was 10.54 seconds.
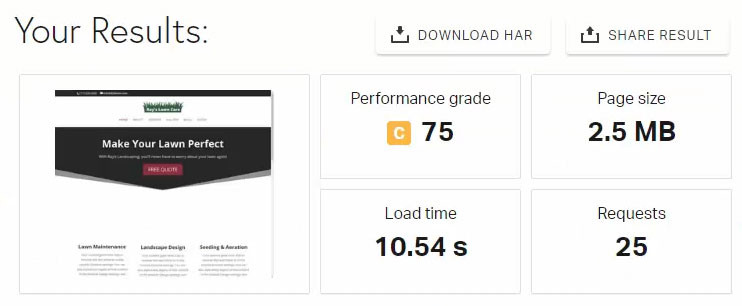
The other cool thing I like is they give you all the file requests that happen when you load this URL in a waterfall style, which highlights if it’s large files that are the issue or the server itself (i.e., wait time).
Upload Web-Ready Images to WordPress
Let’s go into the media library and show you the images here.
Before you upload photos, look at the file dimensions. Free stock photos websites like Unsplash & Pexels are phenomenal for filling your pages. However, they give you high-resolution downloads. They might be up to 6,000 pixels wide or more!
One thing I always do before I upload a photo to WordPress is resizing it to the maximum size needed depending on the widest display of that image on my website. You probably don’t need to exceed 1,000 pixels, and in most cases, something like 700 pixels may be ideal.
You can view your image file dimensions from within the media library, as shown below.
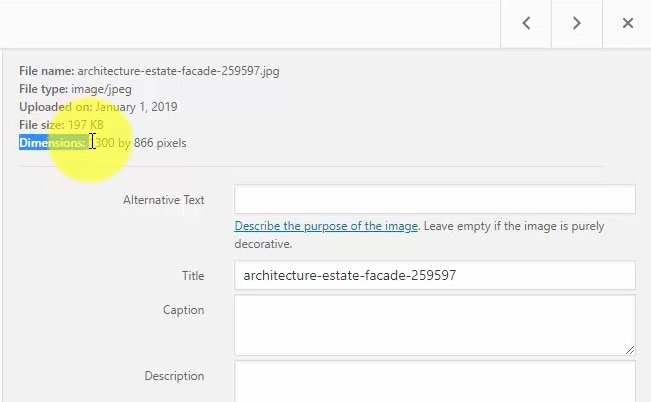
Full-size large photos can both eat up your hosting space (making your WordPress backup size obscenely large) and your bandwidth when people download them by visiting your website.
I use a nifty tool within Photoshop called the Image Processor to resize a large batch of photos automatically.
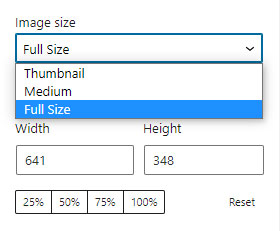
Another WordPress feature worth noting is that they generate multiple files when uploading a photo, including a large, medium, and thumbnail-sized image. So when you’re inserting these images into a page or blog post, you can select those sizes instead of the full-sized photo.
Install & Setup W3 Total Cache
The first plugin we’ll install is W3 Total Cache.
If you don’t know anything about how caching works, click the link to watch my video on the topic.
The quick one-line definition is that caching saves static versions and files of your website, so it loads faster. This happens on multiple levels, including your browser (files get stored on your computer) and server (pages are saved as HTML, so you don’t access the WordPress database often).
If you’re visiting a webpage frequently, there’s a good chance you see the “cached” version, not downloading every file from the website upon each refresh. This is especially true with design files (i.e., your WP theme’s CSS).
Let’s go through the settings that I use on W3 Total Cache for shared hosting without getting too technical. Depending on your hosting environment, you may have to play around with these.
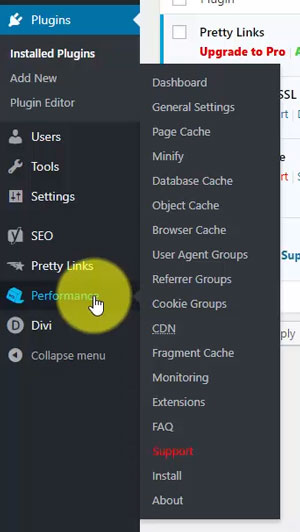
Once activated, we get a new menu option called “Performance.”
General Settings
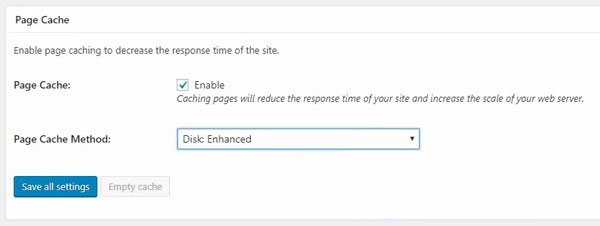
Let’s go through the General Settings. The first thing you want to do is enable the Page Cache.
From the drop-down menu, they recommend “Disk: Enhanced,” so that’s what we’ll choose.
In the CDN section, we’ll use Amazon’s free-to-paid service called CloudFront to host our static website files. As mentioned previously, this step is entirely optional, or you can integrate with another CDN if you’re already set up with the other available services.
You just need to set up an Amazon Web Services account, and they bill you based on usage. However, it’s free up to a certain level, and if you’re just starting, you’re not likely to reach that paid level until you get considerable traffic.
Let’s enable it. Then from the drop-down, select Amazon CloudFront under the “Origin Pull / Mirror” service options.
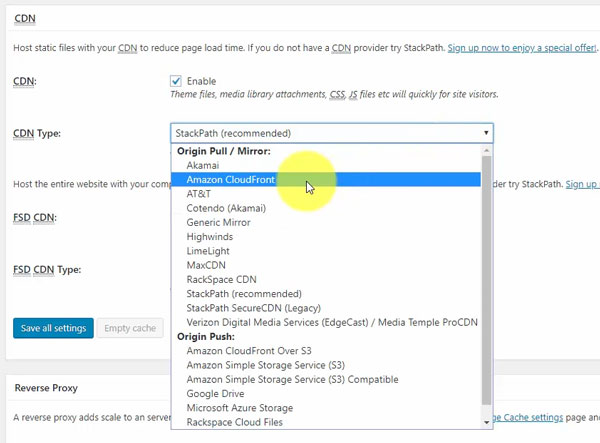
Right now, we’ll leave this as is to finish the General Settings and complete the steps to integrate with CloudFront once we’re onto the “Performance > CDN” page within the WordPress admin (skip to the CDN section below if you’d like to do that now).
The last thing we want to enable is the Fragment Cache. Set this to “Shared Server: Disk,” and we’ll save all these settings.
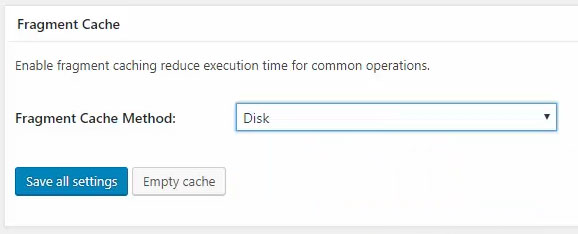
Note that you will see a warning because we haven’t set up the CDN yet. But, don’t worry, we’ll get to that soon!
Page Cache
Navigate to the “Performance > Page Cache” menu.
Select the checkbox “Don’t cache pages for the following user roles” and pick which logged-in users should always see the live website, not the saved cached version. This ensures you don’t get fooled when you’re tinkering with settings or design!
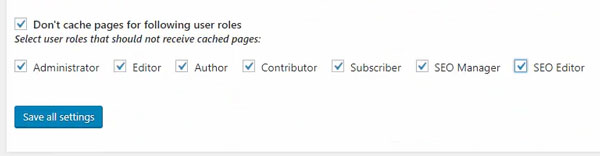
The first five are default WordPress roles, and you may see more if a plugin creates new user roles, such as Yoast SEO, as shown below.
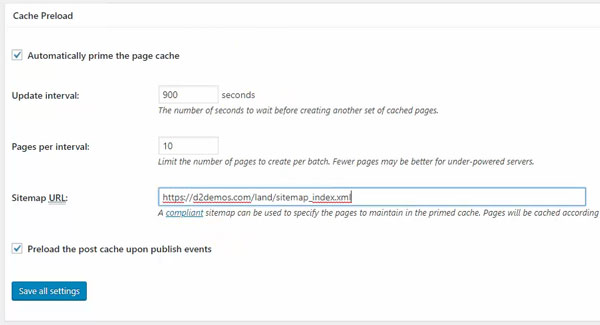
Under the “Cache Preload” section, enable “Automatically prime the page cache” and “Preload the post cache upon publish events.”
They ask for a sitemap, and a plugin like Yoast SEO automatically creates one for your website. If you got that available, copy/paste the URL, which ends with an XML file extension. A sitemap is just a list of your published pages and posts on your WordPress website.
Scroll down to the “Advanced” section and enable “Compatibility mode.” It says that it decreases your performance by ~20% in exchange for increasing interoperability with more hosting environments and WordPress idiosyncrasies. Translation – there’s less of a chance W3 Total Cache will cause an error.

Save the settings for this page, and we’ll move on.
Browser Cache
Navigate to “Performance > Browser Cache,” which will be the last section we’ll adjust before setting up the CDN.
In the General section, enable the first six options from “Set Last-Modified header” to “Enable HTTP (gzip) compression.”
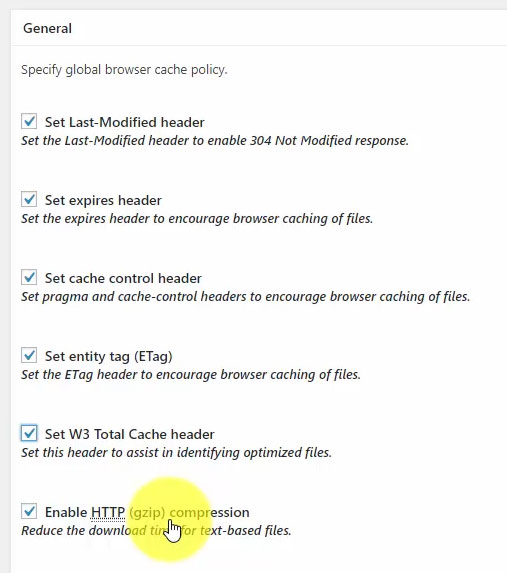
Then a few options later, enable “Remove query strings from static resources.”

A query string is when you see a question mark in the URL, which in PHP passes variables to a page, making it dynamically loaded. You’ll see this sometimes with versions appended to CSS files. Usually, dynamic requests bypass the cache, but we don’t want that to happen with static (i.e., not frequently changed) files.
Let’s save all settings.
CDN (Content Delivery Network)
Lastly, we’ll complete the steps to set up our CDN.
In a new tab, go to your Amazon AWS console and navigate to CloudFront.
We’re going to create everything through the WordPress admin, but you’ll be able to refresh the CloudFront console to see your domain that’s associated with the CDN appear here once we’re done.
Amazon AWS offers a suite of tools for web developers, and one thing I’ve noticed is their sales pages are super technical. As a beginner or even an experienced WordPress guy like myself, you’ll likely scratch your head at what each service does. It took me a while to figure out how to integrate something simple like a CDN, and this tutorial is merged from several that I found which were slightly different than what I needed.
On the CloudFront distributions page, you’ll see all your websites. Just keep this page open.
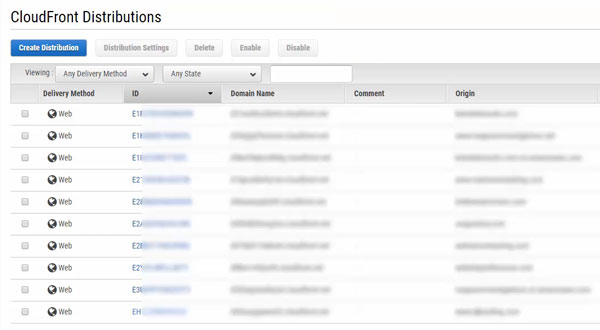
The only thing you’ll need to grab is your AWS secret key and public key, which you’ll get when you create an AWS account. Keep these stored locally on your computer or in a safe place because that’s how you integrate WordPress + CloudFront.
Within WordPress, navigate to “Performance > CDN” and scroll down to the “Configuration: Objects” section.
Enter your “Access key ID” (public) and secret key and public key so that WordPress and Amazon can talk to each other.
All you have to do is click the “Create distribution” button, and it’s automatically going to do it for you. You’ll see the “Created successfully” message, and you’ll be able to verify that it worked when you check the AWS CloudFront console.
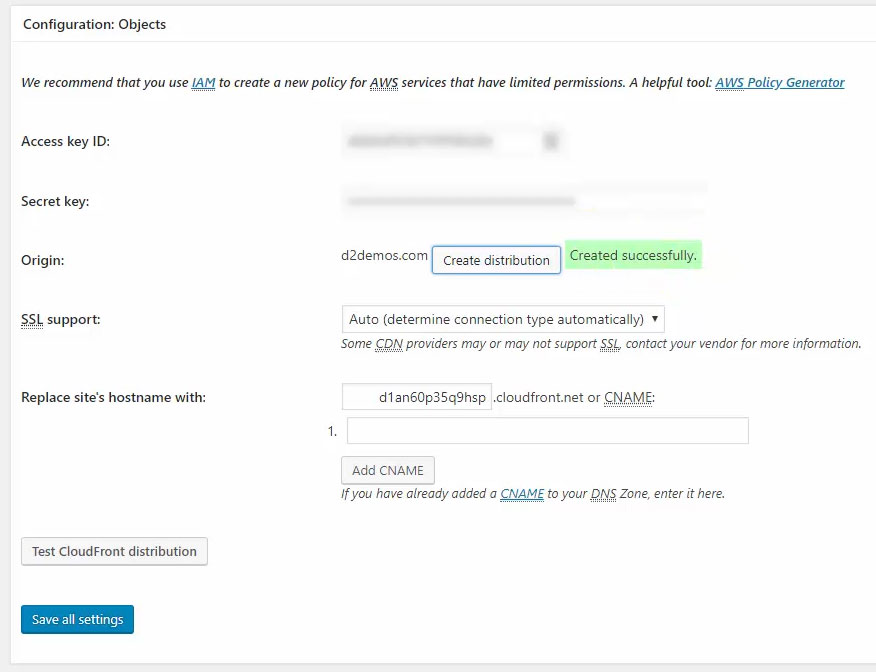
You’ll also notice that under the “Replace site’s hostname with” section, you get a CloudFront subdomain to access files on the CDN.
What happens is that any time you upload a file to WordPress, like adding a photo, it will automatically sync with the CDN. Then when people download the website, the CDN will serve your web files instead of your web hosting space, which is faster.
Go over to your Amazon CloudFront console and refresh the page to see your new distribution.

It has the comment showing “Created by W3 Total Cache,” confirming that your integration is working. Under the “Status” column, it’ll inform you whether the distribution is still in progress or completed.
Go back to WordPress, and click the “Test CloudFront distribution” button. You’ll get an error if it’s in progress, but it only takes a few minutes until it’s ready. So just give it time until that happens.
Install & Setup Autoptimize
We got one final task here, and that’s installing the WordPress plugin, Autoptimize.
Autoptimize will “minify” (remove unnecessary code like comments) and combine our design files to reduce requests.
It also lets you “lazy load” images which means that photos currently off-screen won’t be loaded until the user scrolls down the page. Then, as the user navigates the page, they fade in as needed.
Some WordPress themes may have these features built-in, but most do not.
Let’s install and activate, then navigate to “Settings > Autoptimize.”
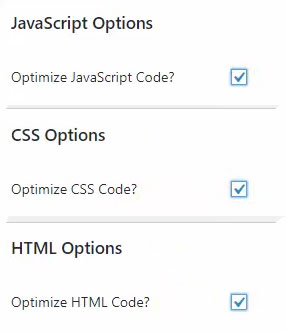
From the “JS, CSS & HTML” tab, enable “Optimize JS Code,” “Optimize CSS Code,” and “Optimize HTML Code.”
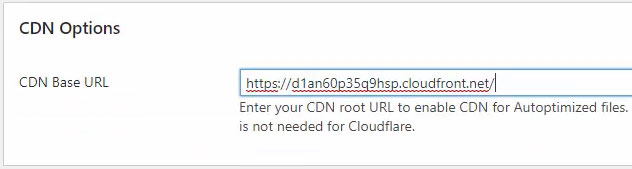
To serve these files from your CDN, you need to copy/paste the CloudFront CDN URL to the “CDN options” section. Then click the “Save Changes” button.
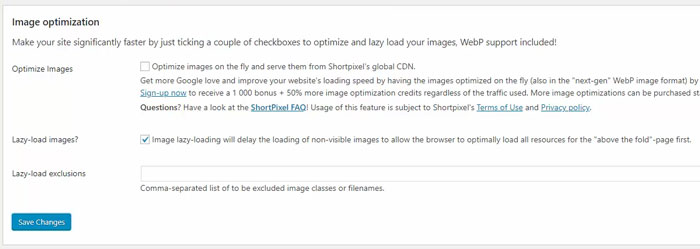
Next, navigate the “Images” tab, enable the “Lazy load images” option, and save.
That’s all we’re going to update!
Compare Website Performance
It’s important to know that the order of CSS files matters for your design to load correctly. Sometimes with caching or minification plugins, CSS files get mixed up during optimization, breaking your layout.
In these rare cases, you will need to manually debug and fix by excluding specific files from being optimized.
Hopefully, that doesn’t happen to you, and we can test our WordPress website speed now that it should be noticeably faster.
First, refresh your pages a few times to help build the cache. Loading the pages will generate the optimized files that subsequent users will load instead of your raw theme files.
Then go back to the testing tools we used before optimization and see what scores you get. If you see the same score, run it a couple of times to ensure the testing tools also utilize the cache features.
Right out of the box with Google PageSpeed Insights, we’re looking good!
Our test website got a 71/100 on mobile and 87/100 on desktop.

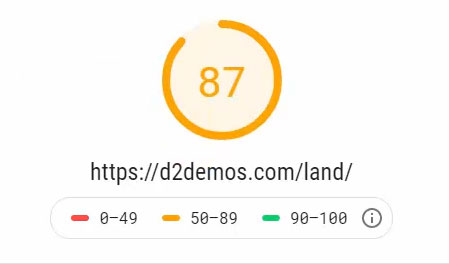
That’s up from 15 and 61!
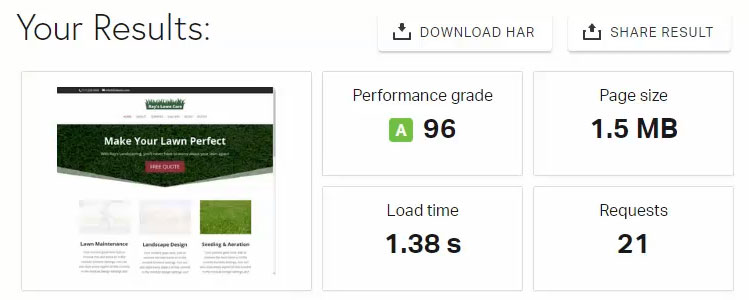
Next, return to Pingdom and make sure you’re testing from the same location you did previously.
Look, we got up to a 96/100, and we’re loading in 1.4 seconds. That’s almost a 10X improvement on what was admittedly a bloated, slow-loading website!
That’s all there is to speed up a WordPress website on shared hosting before you require a hosting upgrade.
Make sure to grab the speed optimization cheat sheet below! 👇