
One of the biggest complaints about WordPress is that it’s hard to customize all areas of your site, from the header to the footer. Well, now, with the latest version of WordPress, you have more control than ever with full-site editing that works with “block-enabled” themes such as Twenty Twenty-Two!
WordPress released its most significant update since introducing blocks, and that’s visual template editing built directly into the core. Moving forward, you’ll see more and more themes adopt this technology.
Right now, you can give it a test run with the yearly theme released by the WordPress team, and that’s Twenty Twenty-Two.
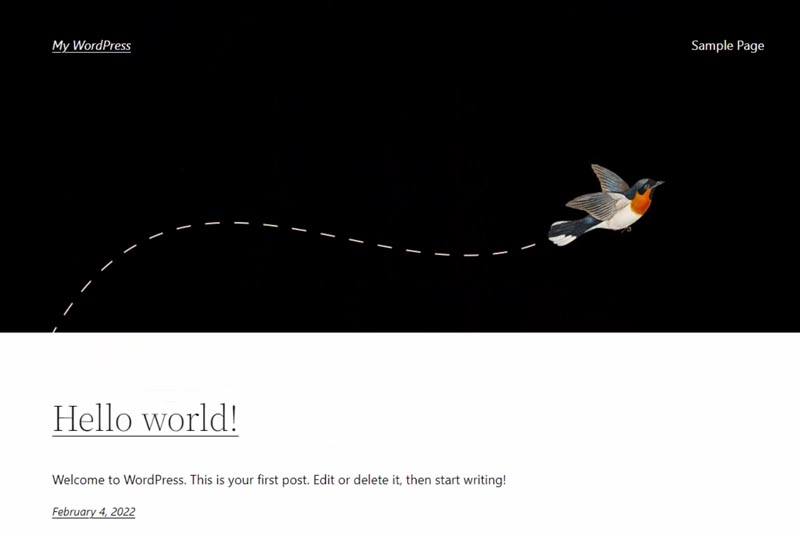
If we look at the demo, this is a blank website using the Twenty Twenty-Two theme.
And here’s how we’ll customize it with the full-site editor in this tutorial.
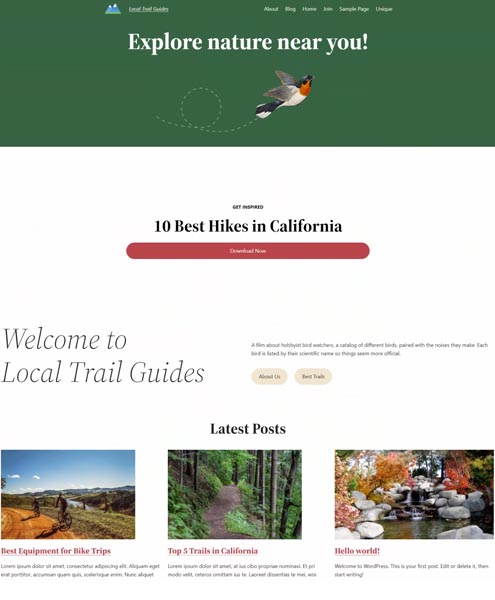
By the end, you’ll be able to create a blog that stands out among the boring templates!
First, download the tutorial assets below to make it easy to recreate what we’re doing today.
WordPress Full Site Editing Tutorial Resources
Want this helpful free giveaway or training?
Create Your Primary Pages
To create a unique homepage layout, go to the Pages section within your WordPress admin area to publish a “Home” and “Blog” page.
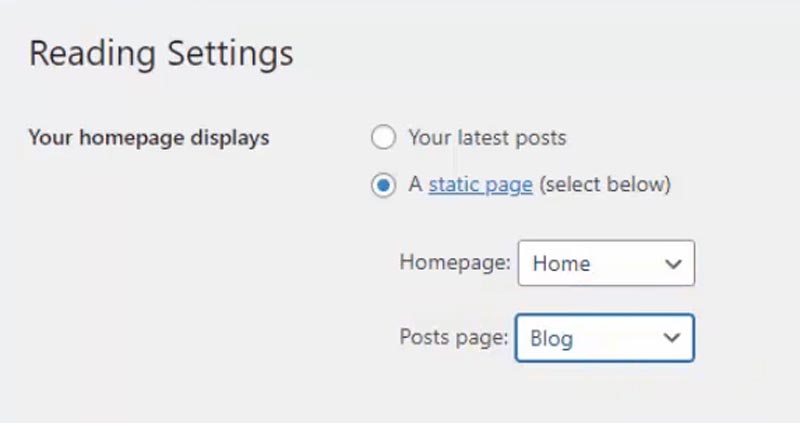
Then go to Settings > Reading and for the “Your homepage displays” option, select “A static page,” then choose your newly created Home and Blog pages, and save your changes.
Now we can dig into full site editing!
Full-Site Editor Overview
Go to Appearance > Editor to view your new capabilities. If you aren’t a WordPress beginner, you’ll notice no Customize or Menus submenu is showing under Appearance. This is because it’s all built into the new visual editor.

The basic gist is you’re building your entire website with blocks, from the header down to the footer.
On the top-center of the page, you’ll find the drop-down showing you what template you’re seeing on the visual editor. In our case, we see the Page template. There are also template parts such as the Header and the Footer.

Just click the Browse all templates button to view all your theme templates.
These templates used to be available in your theme folder as PHP files that only developers would edit and customize. Finally, the full-site editor brings this capability to the average website owner who doesn’t know code!
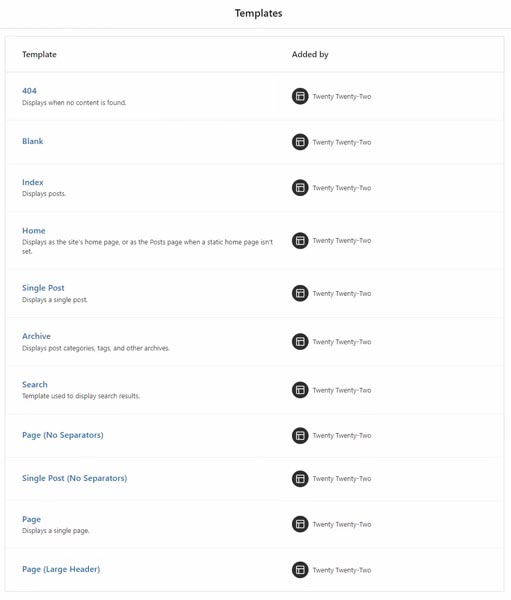
For instance, if you want to customize the look of your blog posts, you will use the Single Post template.
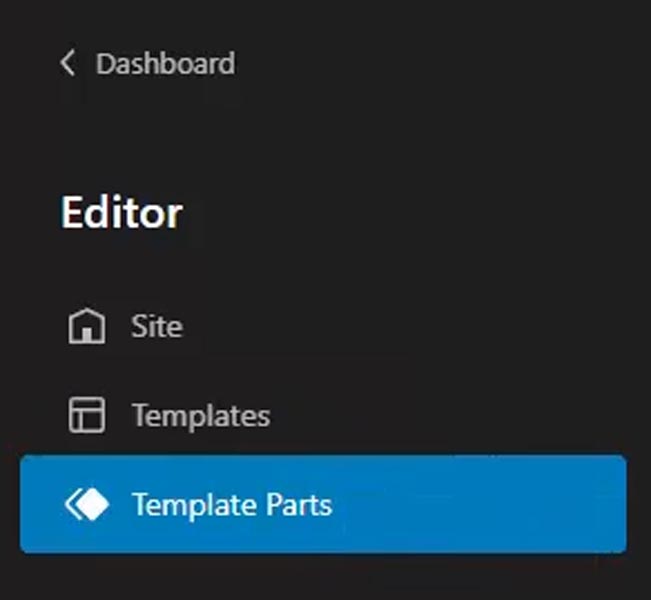
From the left menu, select Template Parts to view variations of your Header and Footer that you can insert into your templates.
One confusing point goes back to the static homepage setting.
This home template shows our posts page, a.k.a. the blog. If we were showing our posts on the homepage instead, that’s where this Home template would apply.
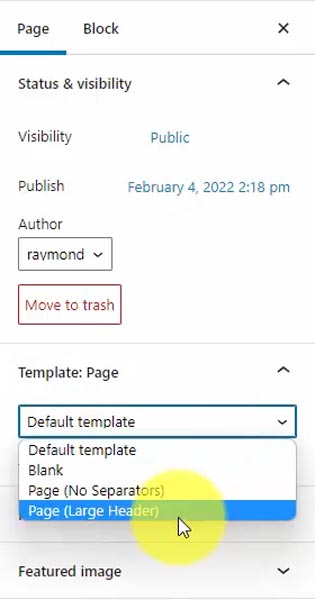
To edit our static homepage, we can manually assign the template. Go back to the Pages section and select your home page. In the right sidebar, there’s a Template drop-down currently using the default one — the Page template — and we can assign that the Page (Large Header) template instead.
Look at your home page — you should see the new template layout!
Let’s go back to the editor, where I want to point out a few critical notes.
You’ll select a block element when you click anything, but there can be many nested layers. The hierarchy shows at the bottom if you’re unsure what block you’ve selected.
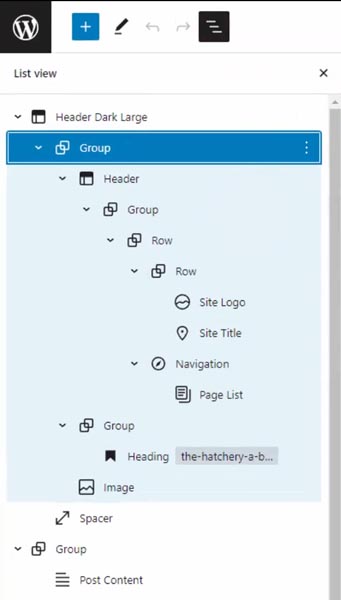
For example, if we click the Site Title, you see it’s nested within Groups, Rows, and two template parts (Header & Header Dark Large). You can click on any of these levels to view each block’s settings.

In the top-left, click the three horizontal line icon to toggle the List view, showing you the block hierarchy within that template. That makes them easier to select instead of clicking on the block and not knowing which level you’ve selected!
The last thing is the Styles button with the ◐ icon in the top-right of the editor window. Select this to set your theme styles, such as typography, color palette, and default block design.

I like Coolors.co to generate and browse high-quality color schemes instead of creating them from scratch.
Make any changes to your theme styles. Then when you insert blocks, it’s easy to transform them to match your desired look.
Editing the Templates
Let’s begin with the Page (Large Header) template. We’ll change the first headline, making it bold and center.
Then, I’ll change the background to our theme’s green. To do that, I’ll exit the Styles menu, bring up our Settings (gear icon), and then select the Group block within the Header Dark Large template part. That’s where we choose our Background color.

We’ll also upload a logo. Let’s open up the List view and select the Site Logo block. Then click the upload icon to add to your WordPress media library.
Adjust the settings such as image size, linking to the homepage, and using the logo as your site icon, which appears in the browser tab.
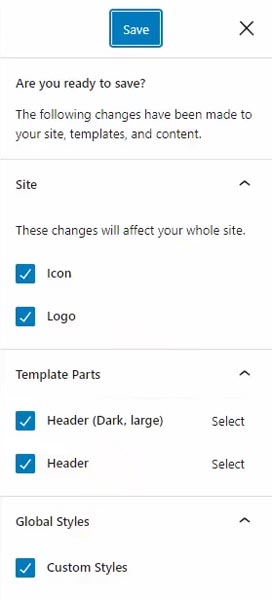
Let’s save, and WordPress will tell you exactly what parts of the template you’re changing. In our case, it’s the icon, logo, two header template parts, and the theme styles.
Adjusting Spacing Between Elements
The padding on our header is significant, and I’d like to tighten that up a bit. Situations like this are where the hierarchy comes into play.
To further complicate things, with CSS (the final code output of your custom styles), there are two ways to add space using margin or padding.
For a deeper dive into what I’m talking about, look at this excellent explanation of the CSS box model.
You can set this margin/padding at multiple levels. Sometimes it’s the Group block. Other times, it’s applied to the row, or it could simply be a Spacer block.
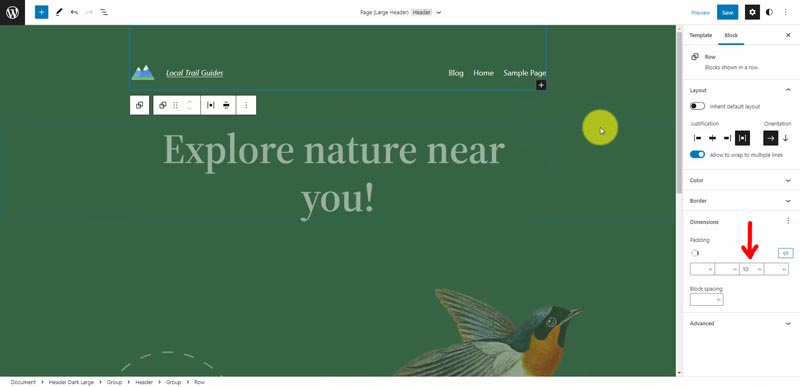
In this case, we’ll edit the padding on the first Row block within the Header template part. Then, after selecting from either list view or the hierarchy shown at the bottom of the page, it will outline your selection with a blue border.
Let’s set the bottom and top padding to 10 pixels.
WordPress Block Patterns
Like WordPress has themes and plugins, they’re taking that one step further with block patterns.
To add a pattern, click the plus button on your template and select Browse all. Then, from the left menu, click the Patterns tab for pre-built layouts that you can easily add to your website with one click.
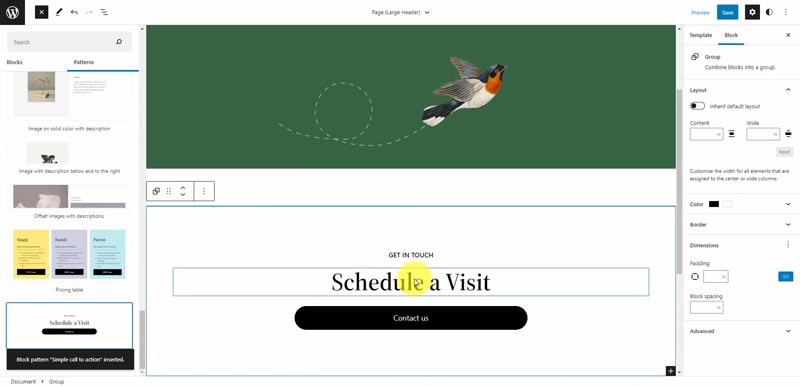
Scroll down to view, and select “Simple call to action.” This gives you a line of small text with a headline and button.
The patterns work nicely with the Twenty Twenty-Two theme, and we’ll test a few in this tutorial.
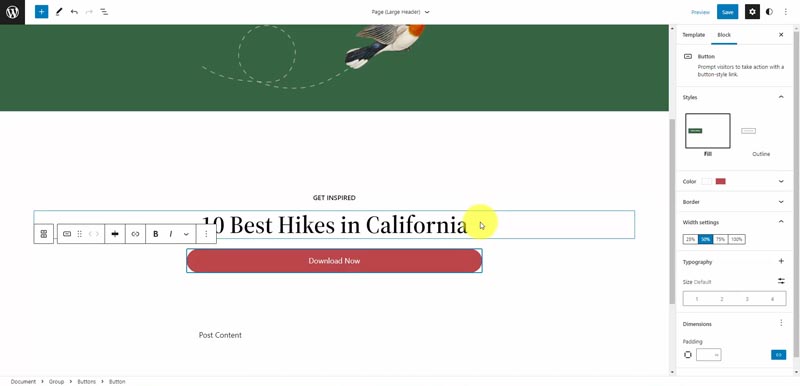
We’ll customize the button color to our theme’s red contrast and change the wording.
If you’re using a call-to-action (CTA) for an email form, I recommend Mailchimp as your provider since they have a free option for up to 2,000 subscribers.
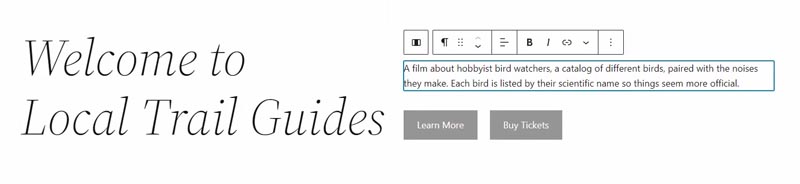
The next pattern we’ll try is “Wide image with introduction and buttons,” but I’ll remove the image (since it’s the same one used at the top) and change the text to a welcome message. You can style the buttons to match your theme or use a new style for contrast.
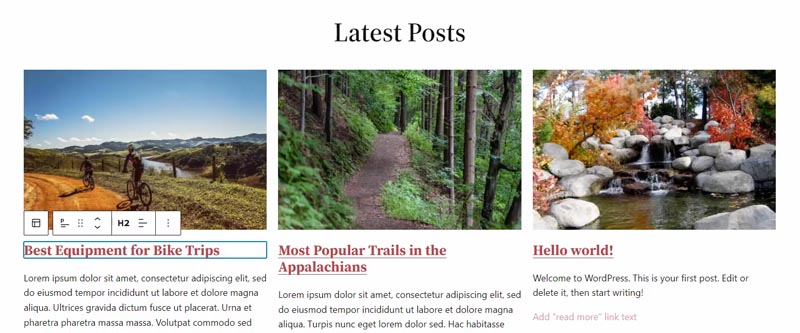
Our last block pattern to add is “Featured posts.” If you haven’t published posts yet, the preview window won’t show anything, so I recommend adding some filler blog content if that’s your case.
We’ll make a few minor customizations. First, let’s make the “Latest Posts” title bigger, and we’ll center it, too. You can transform the paragraph block into a heading to do this.
We’ll also make the post title bold, and any changes you make should update all of these post elements after editing one of them since they’re linked. For the post title, the bold option isn’t located in the block popup menu. Instead, it’s on the right-panel menu under the Appearance dropdown button.
I’m not going to show the post date on the homepage, so I can just delete this block, but we will show it on the blog and single post pages.
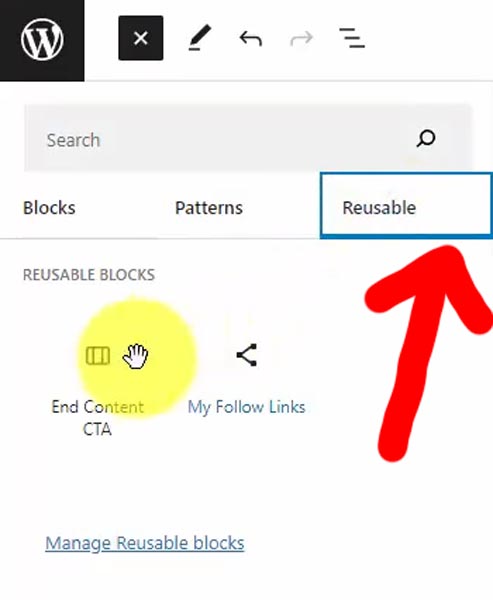
Next up, let’s add social media icons to the footer with reusable blocks, a cool WordPress feature. The benefit is if you insert these social icons into another template or part (i.e., the sidebar), you add the reusable block. Then when you edit it, the updates are synced across all instances of that block.
Let’s click into our footer. The footer template part consists of two group blocks, then a row with two columns, each containing a paragraph block.
We’ll insert our links into the higher-level group with the Social Icons block. Click the plus button to add the networks where you’re active. Choose the icon styles, layout, and link settings from the right menu. I set external links to open in a new tab, and internal links (my domain) stay within the same browser window/tab.
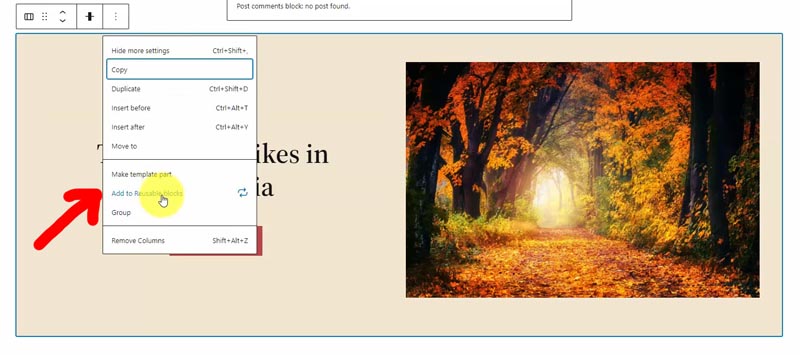
Click the three-dot icon from the social icon block menu, select “Add to Reusable blocks,” then give it a name and save both the block and your template.
Let’s add one more reusable block for a call-to-action on the templates that display single pages (other than the homepage) and blog posts.
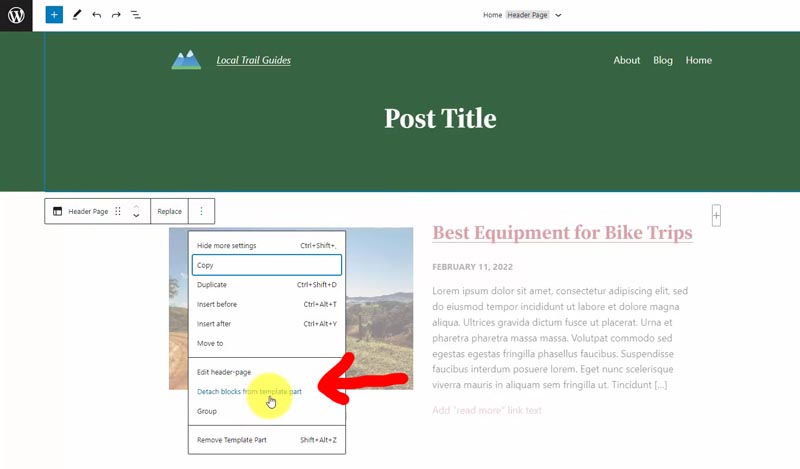
In the top-center of the editor window, click the dropdown to select “Browse all templates.” We’ll start with the Page template and add a custom header that includes the green background with the page title.
Right now, this is the plain Header template part, and I don’t want to edit this. So instead, we can click the three-dot icon and select “Detach blocks from template part.”
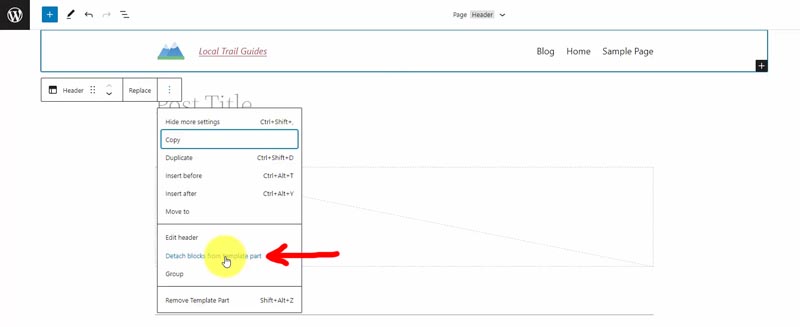
This option allows us to start with an existing header to build our custom template but save it as a new template part (instead of overwriting the Header template).
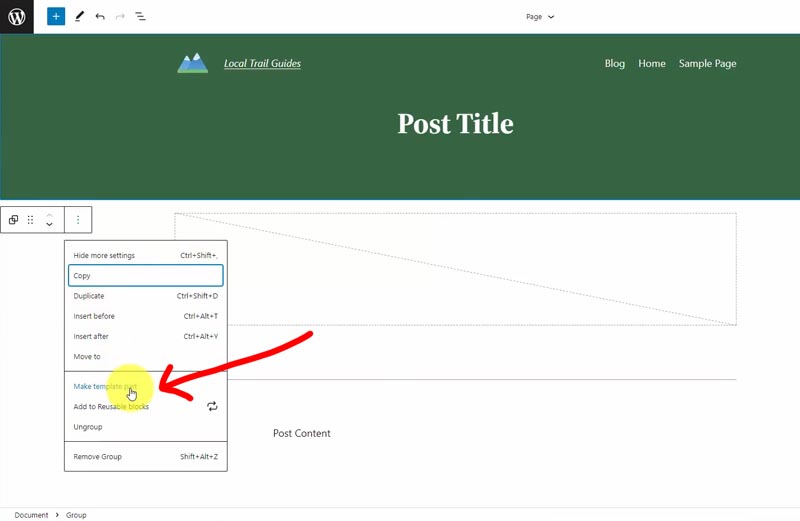
Go into the header group and change the background color to green, plus the text and links to white.
Then you can drag the Post Title block from the body area right up into the header under the logo and menu. It should automatically adjust the color to white for better contrast, and you can make it center and bold.
We’re ready to save this template part, so select the group, click the three-dot icon, select “Make template part,” and name it Header (Page) while defining it as a Header area from the options.

Click create and then save your Page template, too.
Editing Page Content
Let’s make an About page and add content to see how our customized template looks.
I’m starting with the Sample Page generated when you install WordPress and changing the title & permalink to “About.” If you don’t have one, just create a new page.
Set the Featured Image by uploading one to your media library.
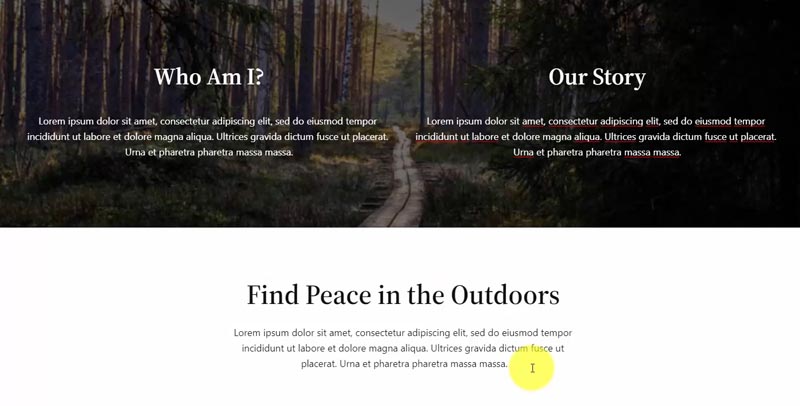
Then to the bottom of our page content, we’ll add the Cover block, which is an image overlay. Upload a new photo or select an existing one from your media library.
You can change the alignment to make the Cover block full-width, and let’s transform the paragraph block into a column block with two columns that stack on mobile.
Then fill the columns with some content like headings and paragraphs.
Add a spacer block below the image overlay section to give it a little room, then another centered heading and paragraph.
Call-to-Action on Every Page & Post
The last section will be a reusable block for a call-to-action to join your email list. We’ll put that at the end of each post and page.
Let’s go back to the Editor and select the Page template. Scroll down to the bottom, and we’ll add a pattern for this email signup.
Click Browse all, go to the Patterns tab, and choose Subscribe callout.
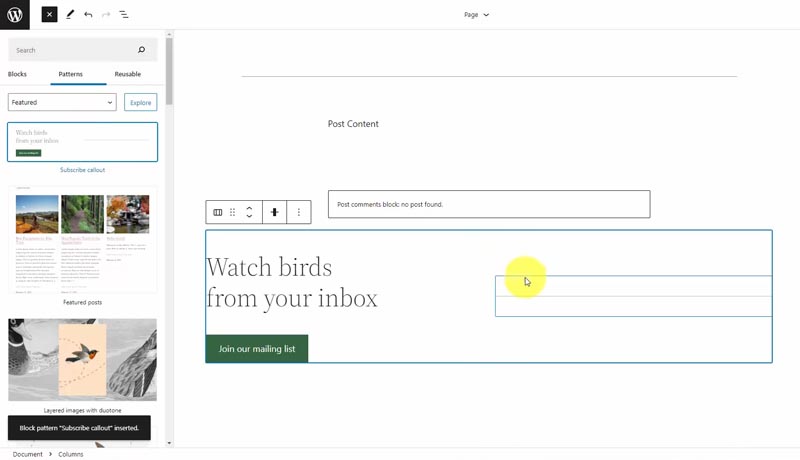
Remove the separator and replace it with an image.
Then change your title and button text to your call-to-action and update the button to a contrasting color in your color scheme.
You can then change the background color on the columns element to a secondary color, so your call-to-action stands out more.

All you have to do to get it working is link up the button to your email marketing provider — Mailchimp is my preferred choice to start for free.
The final step is to make this a reusable block.
Click the three-dot icon, then “Add to Reusable blocks,” name it something like “End Content CTA” and save.
Then save your Page template, and we’ll add this reusable block to our Single Post template.
Updating the Single Post Template
Go back to the template editor and go into your Single Post template.
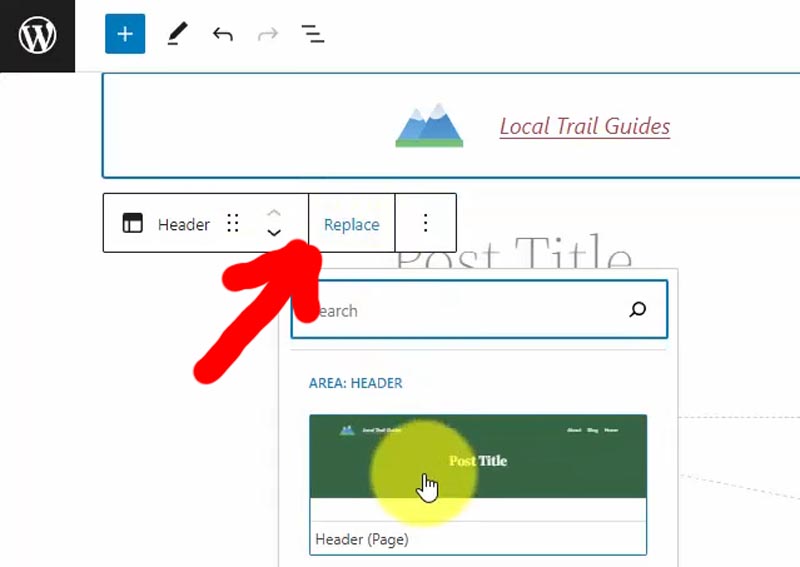
Select the current header, and click the Replace button to find the custom Header (Page) template part. That’ll make our blog posts match the look of our pages.
Then delete the existing post title under the header.
Scroll to the bottom and add your CTA reusable block.
Once you start building custom blocks and using patterns, your design speed becomes much faster!
Let’s save it and review a few blog posts to see if everything looks good.
Home Template (a.k.a. The Blog Posts Page)
As mentioned before, this template name is a bit deceiving.
If you don’t change any settings, your homepage will show your blog posts. In this default case, the Home template makes perfect sense.
However, if you have a custom page design for your homepage, this template will run your Posts page.
90% of the time, I create two pages — Home & Blog — and assign those to the Home page and Posts page within the WordPress settings.
Let’s jump into the Home template.
Once again, we’ll replace the existing Header Dark Small template part with our custom Header (Page).
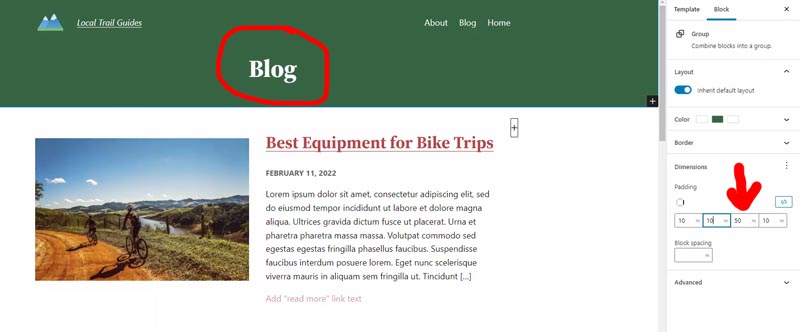
There’s one minor issue, and that’s the Post Title block. The live page shows the first blog title. So I’m going to manually change this to “Blog” using a heading element.
Before doing so, I must select the header, click the three-dot icon, and “Detach blocks from template part.”
If I missed this step, we’d save our template, and every page & post would incorrectly show “Blog” as the title!
We can add a heading block, set the Appearance to extra bold, and then delete the existing post title block.
Finally, navigate to the top-level Group block within your header, and set the bottom padding to 50px, which closely matches the Header (Page) template part.
If you click on the posts, you’ll see the Query Loop block generates them.
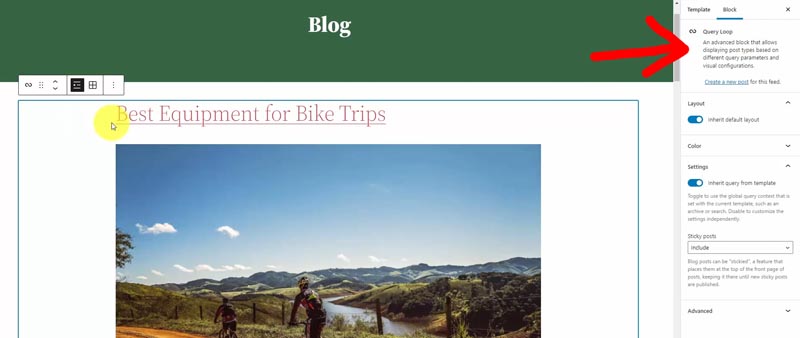
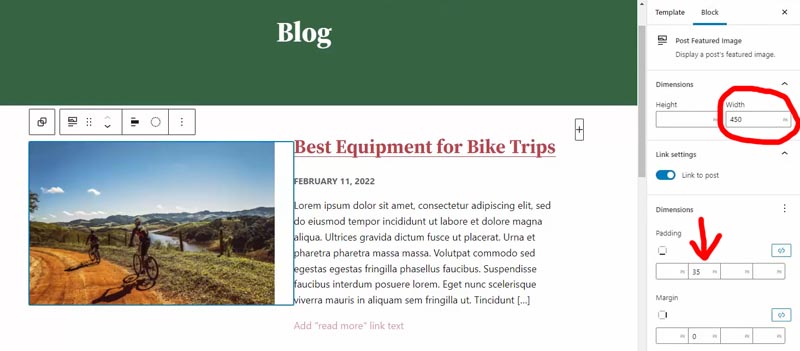
The blog posts now show full-width feature images, and I want to switch that to smaller images with the title and text aligned to the right.
Go into the Post Featured Image, which right now is max 1000px. Change that to Align left, set the width to 450px, and add right padding of 35px.
Drag and drop the heading above the text, change the Appearance to bold, and set the Size to extra large (4).
Then move the date from the bottom to below the title. You can disable the Link to post option, and we’ll make some style changes.
Within the Typography section (use the three-dot icon to see all options), change the Appearance to bold and the Letter-case to uppercase. Then update the color to a gray like hex code #666666.
Let’s add our call-to-action reusable block to the bottom of our blog like the other posts and pages.
Save this template and admire your web design work!
Over time, I’m sure many more themes will adopt this new technology, and WordPress will continue to improve performance, features, and ease of use.
I hope you have a good grasp of how to use WordPress full site editing by now. So take this tutorial, and now use your imagination to create a unique blog or website!
WordPress Full Site Editing Tutorial Resources
Want this helpful free giveaway or training?