
WordPress recently launched the Twenty Twenty-Four theme, improving on the previous few that are made 100% with Gutenberg blocks. Let’s take it for a spin today!
WordPress is continually upgrading the full site editing features, and in this new theme, they’ve enhanced the pre-made layouts, making it more user-friendly. So, instead of completely revamping this website, I’ll make minor customizations to build on what they’ve given us.
Install Twenty Twenty-Four Theme
Let’s dive into the dashboard of a fresh WordPress installation. We’re using WordPress version 6.4.1, and on the dashboard, you’ll see if the Twenty Twenty-Four theme is installed.

If not, navigate to “Appearance > Themes” to install it.
Full Site Editor Overview
Once activated, we can go to “Appearance > Editor” to modify all our templates.
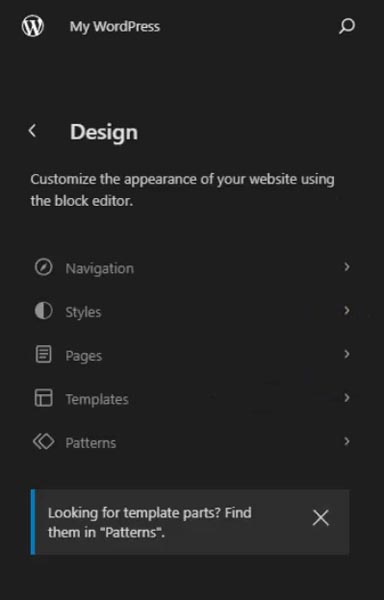
WordPress has added a menu on the left, giving access to:
- Navigation
- Styles
- Pages
- Templates
- Patterns (including Template Parts)
Included in this update is a feature that allows editing of page content within the template editor. This resolves a major frustration users had when designing their templates, thinking they could add content directly there vs. the Pages section from the admin area.
With every release, WordPress introduces new UI changes while empowering full site editing — which can be confusing if you log in and things suddenly look different after a core software update.
For example, reusable blocks are now called “synced patterns”. For template parts like the header and footer, you’ll now find those in your Patterns.
As you can tell, WordPress is undergoing plenty of changes to modernize the way you build websites. Expect these transformations (& powerful features) to continue for the next few years!
Pick a Style Variation
Now, let’s explore the pre-made styles available.
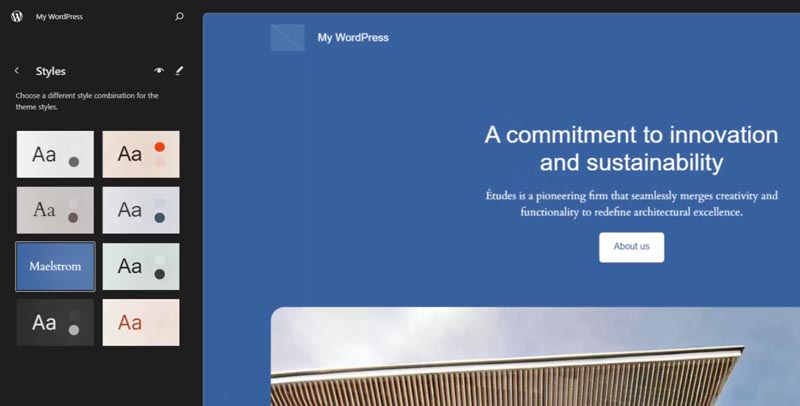
There are eight options, and I’ll select the blue one called Maelstrom. This theme comes with a homepage layout example for an architecture company, which we’ll use.
After saving the selection, I’ll start by creating a couple of pages and uploading the media required to complete this design.
Publish Photos to Media Library
Navigate back to the dashboard and go to the Media section.
📝 Grab the “Twenty Twenty-Four Theme Tutorial Guide” below, including all the photos & the step-by-step process we’re doing now!
I’ll drag and drop the files by clicking “Add New Media File.”
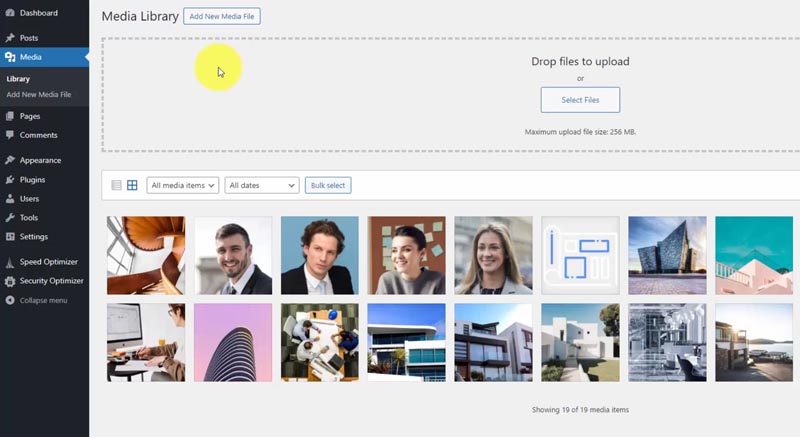
Now, we have all the photos we need to fill into our templates and pages.
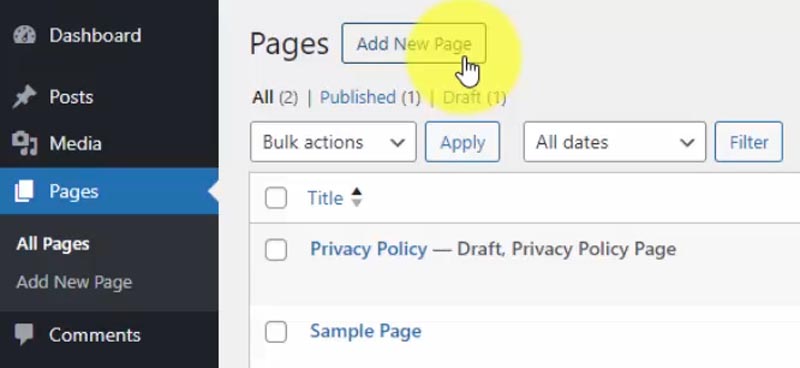
Publish Pages with Patterns
Moving over to the Pages section within the dashboard, click on “Add New Page.”
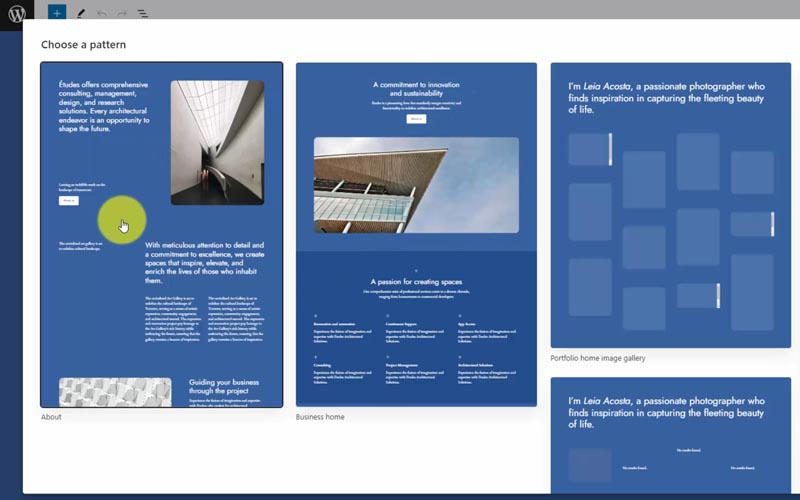
With Twenty Twenty-Four, you have the option to choose a pattern right as you create a page instead of starting from scratch.
I’ll quickly add a few pages and we can test out adding content from the template editor instead.
Our homepage uses the “Business home” pattern.
Let’s create an About page using the “About” pattern. Set the title and publish.
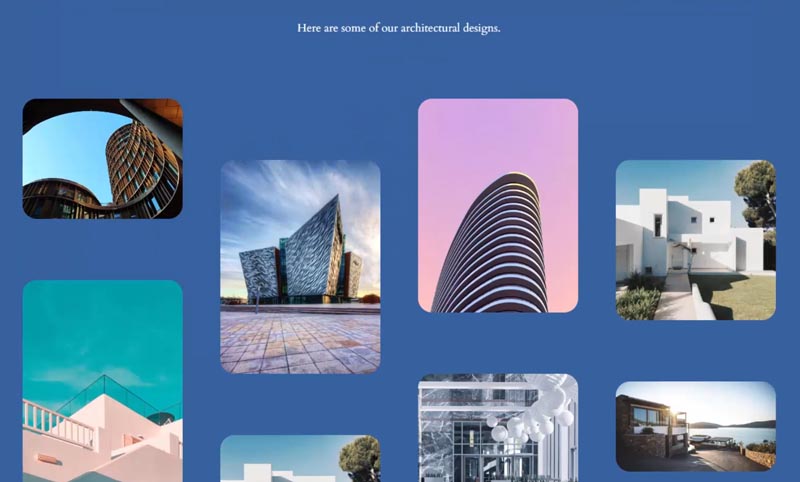
Next, create a portfolio page using the “Portfolio home image gallery” pattern.
Finally, create a pricing page. There is no complete page layout pattern within the popup list, but we can find a pricing table pattern another way. Let’s publish it as an empty page, and we’ll finish that in just a bit!
Navigating the New Template Editor
Now, if we move back to “Appearance > Editor”, let’s dig into the specifics of how you’re going to customize your layouts.
You can easily access the editor by clicking the preview window.
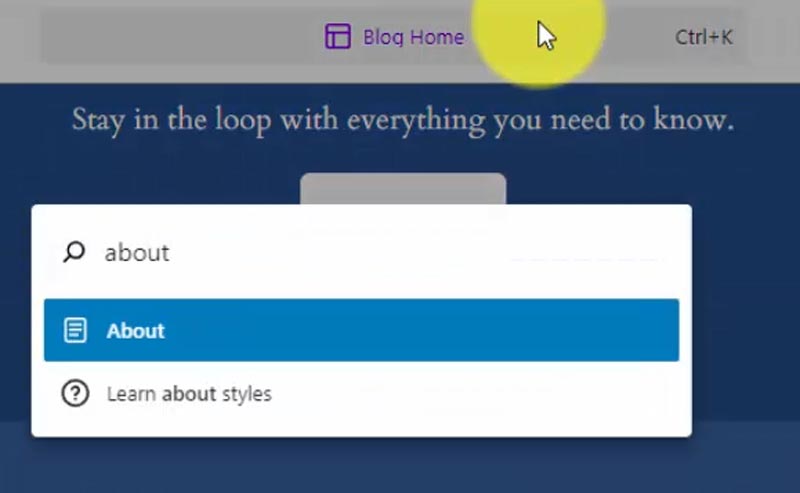
Search for Templates, Parts & Pages
At the top center, this navigation lets you move between templates, template parts, or pages via search (or keyboard shortcut CTRL+K). Previously, this was a dropdown menu.
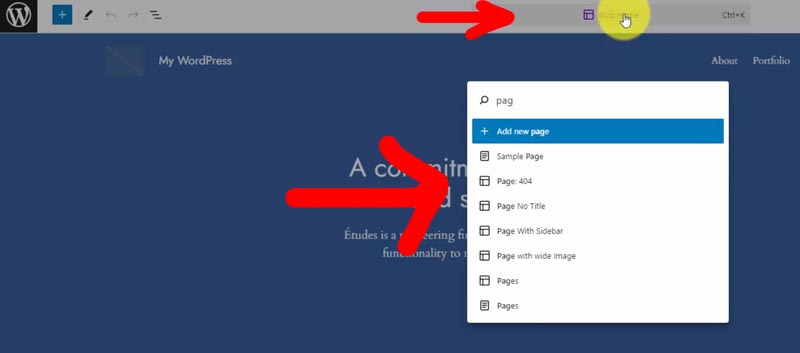
We’re currently editing the “Blog Home” template, which will be displayed on our homepage. If you want a fully custom homepage, you can create it in the Pages section and set it as the Homepage within the WordPress “Settings > Reading” section.
If you want to edit an individual page (like the ‘About’ page we just created) or the overriding template that applies to all pages, you can search for either.
Notice how the icons vary depending on whether you’re editing a template, a template part, or a specific page.
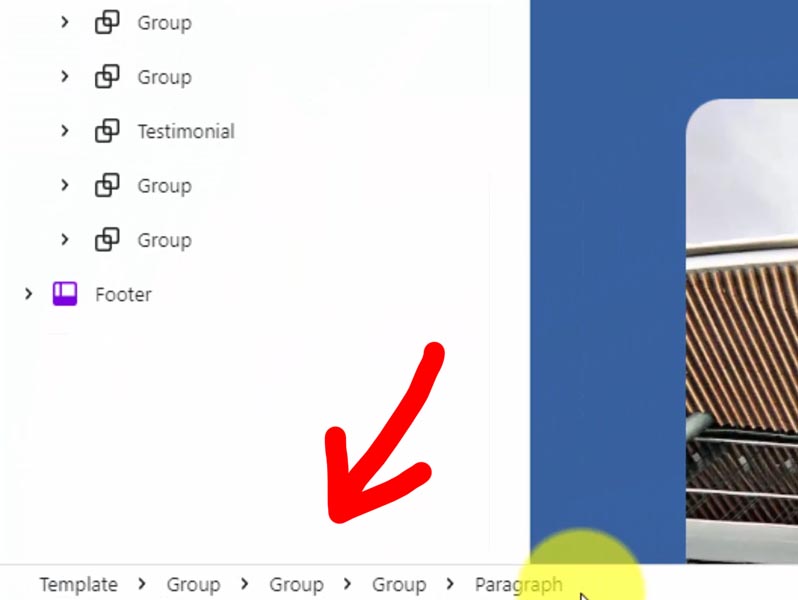
Enable List View
In the top left, click the three-line icon to find the hierarchy of blocks comprising the template being shown on the editor preview window.
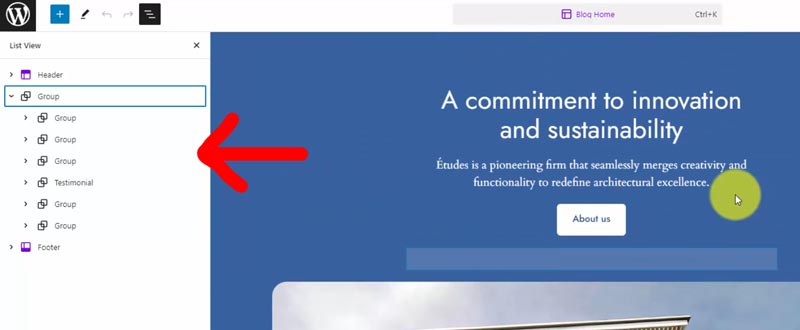
At the top level, we have our Header & Footer template parts, marked in purple.
All the content in the middle is organized within Group blocks, creating various sections on this homepage.
If you want a single-line description of the selected block’s nested hierarchy, look to the bottom left.
Settings & Styles
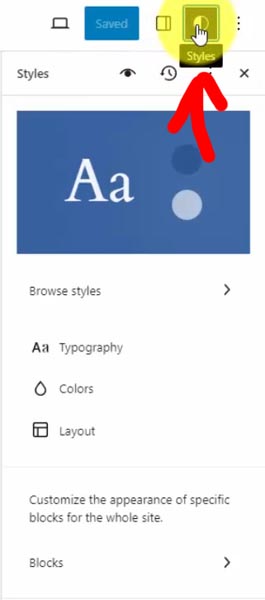
On the right side, you’ll find your Settings and Styles options, which you can show or hide by selecting the respective icons.
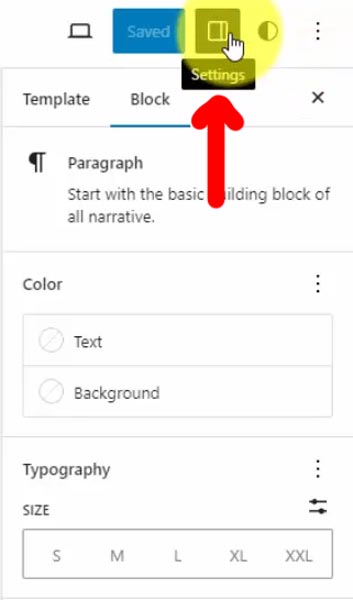
Within the settings, you’ll find individual settings for the selected content block, and when you deselect, you may also see settings for the entire template or page.
The styles are the defaults that apply across your entire website.
In the top right corner, you can open a preview window or change the screen size, allowing you to switch between desktop, tablet, and mobile views.
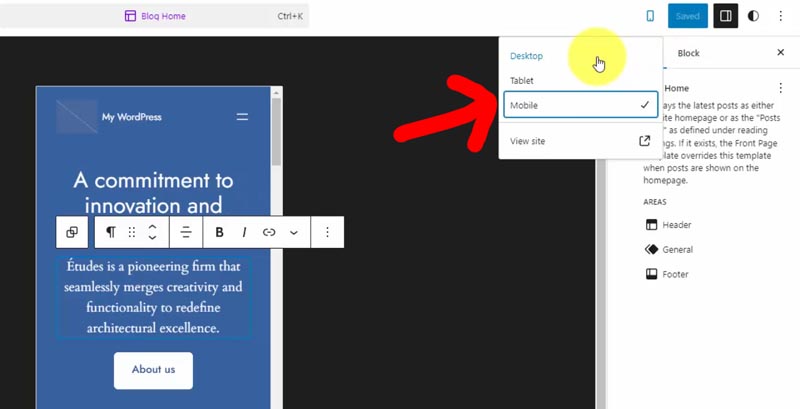
Make adjustments if necessary to ensure your design is mobile-friendly.
Set Your Custom Styles
If you want to change the pre-made style that we chose (Maelstrom), you can access it from the “Browse Styles” button, just like we observed within the template editor landing page.
With WordPress, there are typically several places where you can edit the same thing!
This is even more evident now with Twenty Twenty-Four, as you can edit the page content directly within the template editor or navigate to the Pages section to edit there.
With the Styles menu open, click on the eye icon to see the “Style Book”.
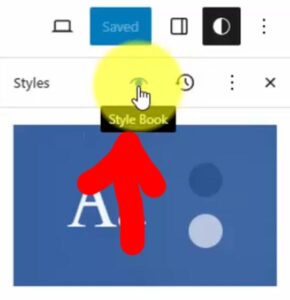
It provides a preview of how various blocks appear, including quotes, lists, code, images, buttons, and much more.
You can further customize the pre-made template by adjusting typography, colors, and layout settings, which apply to your entire site.
I’ll only make a few small changes.
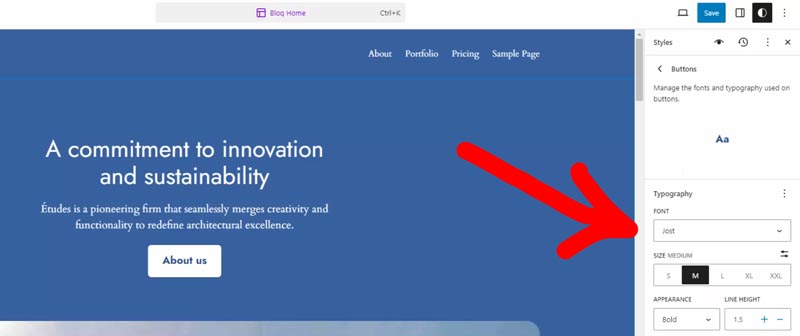
I’ll dive into the “Styles > Typography > Button” settings to modify how all buttons appear. Let’s increase the size to medium and make them bold.
I’d also like to convert it to uppercase, but it seems this option isn’t available in the typography section. To achieve that, let’s backtrack a bit and head into “Styles > Blocks > Button”.
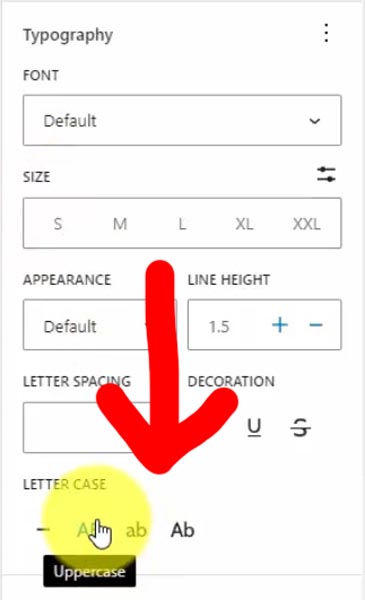
Scroll down to the typography section to switch the “Letter Case” option to uppercase.
You can do as little or as much customization as you’d like.
For instance, you can set the default style of any block from “Styles > Blocks” and search for your desired block.
Although this one comes with a built-in color palette, you can adjust it or create your own from the “Styles > Colors” section, that way, it’s ready to go when you create content and want to edit something.
Edit “Blog Home” Template
Let’s start from the top.
Customize “Header” Template Part
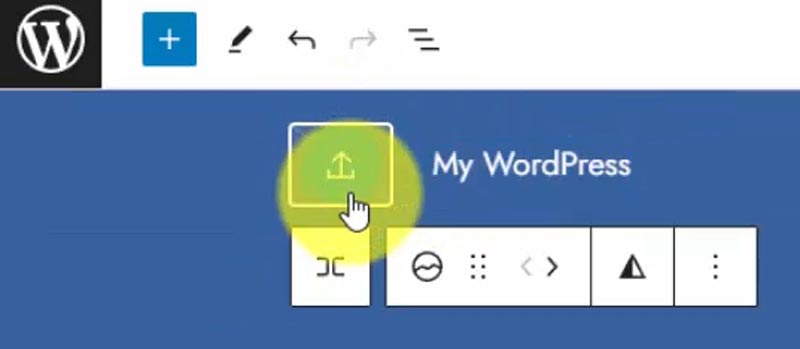
There’s a space already designated to upload our logo.
We’ll simply click that button and select the logo from our media library.
Next to the logo, we have our “Site Title” block, which is currently showing “My WordPress”. Just select it and edit the text — I’ll paste the name of the architecture company.
You can also manage this through the WordPress admin area via the “Settings > General” section to set the title & tagline outside of the editor.
Customize Homepage Content
Go through the template and replace the stock content with your own. I’ll show you a few simple examples.
Let’s link up the first button to our About page.
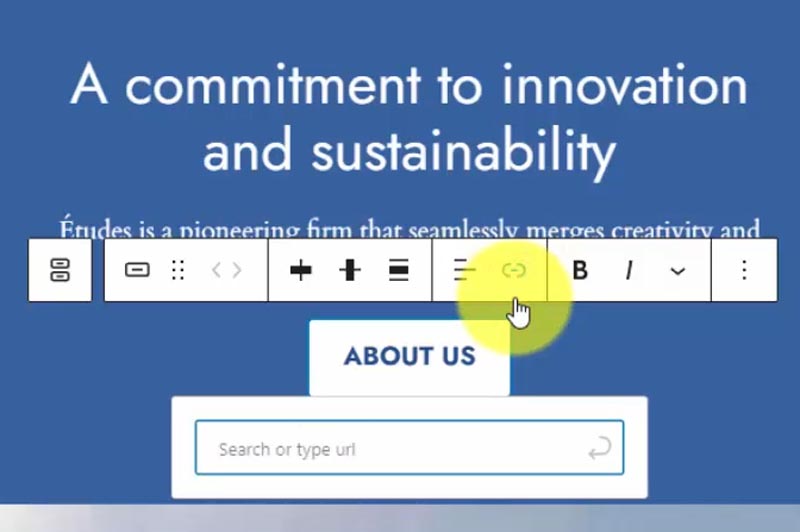
Select it and click the link icon, then search for “about,” which should pull up our page.
Now, let’s swap a photo with our own.
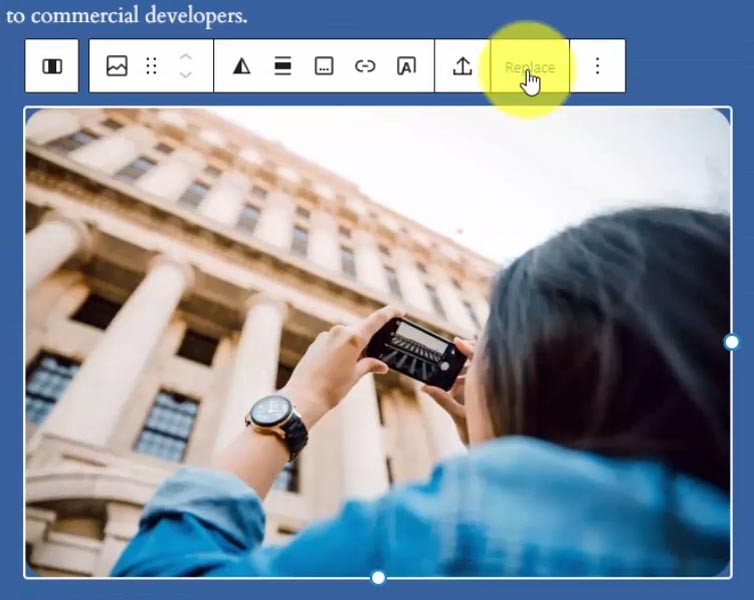
Select an Image block, and hit the replace button. We’ll access our media library and choose one.
Moving on to the Headline block, here’s a new feature — adding an asterisk to the headline.
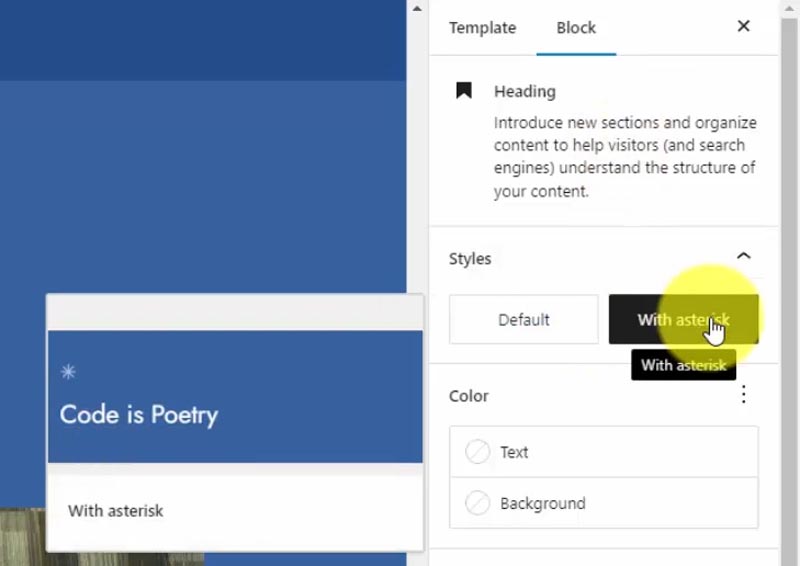
If we open the settings, you’ll notice the option to either have a default heading or one with an asterisk.
Next, let’s look at a minor inconvenience.
The testimonial section includes an area to upload a headshot icon of the person. However, it’s tricky to click because of its size, causing these scroll bars. The “Media Library” link and upload button are barely visible.
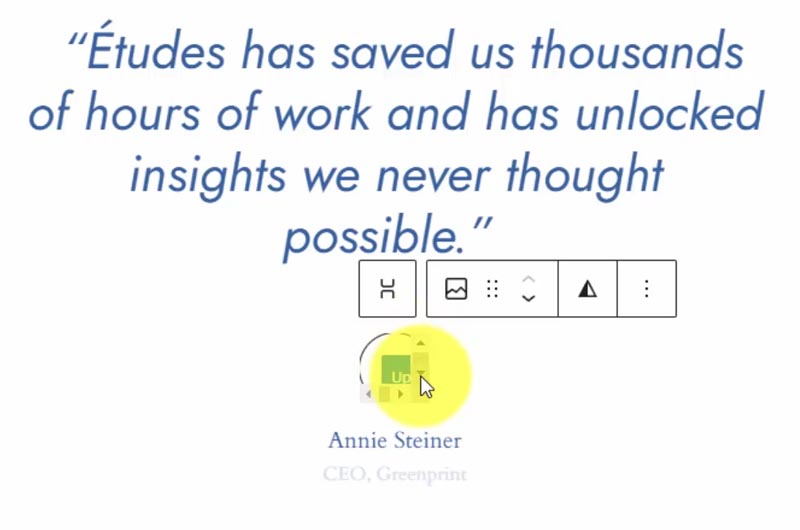
Luckily, there’s just enough room for me to click!
Customize “Footer” Template Part
Now, onto the footer section.
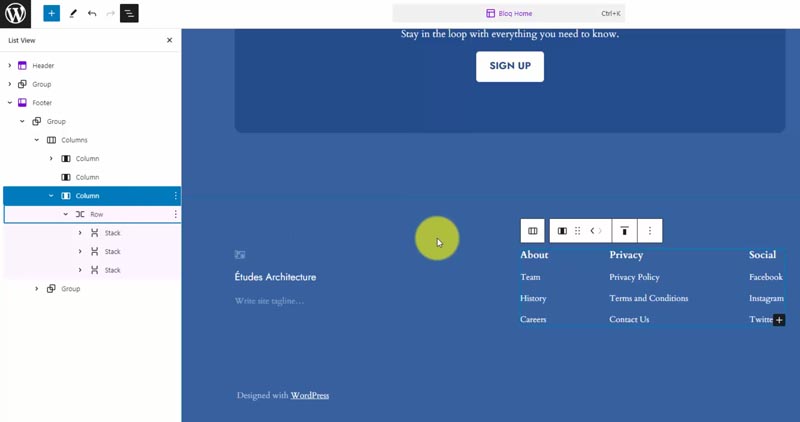
Analyzing the footer structure, we notice a group with three columns. Interestingly, the second column contains no content and acts as a spacer. The third column displays three more columns of links.
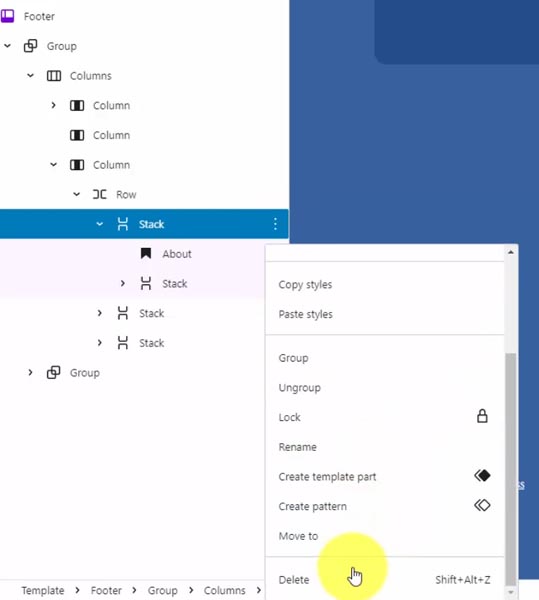
To streamline this, I’ll remove the first link list, meant for sub-pages of the About page, which we haven’t created yet. To trash the Stack block, select it from the list view, then click the three-dot icon and choose “Delete”.
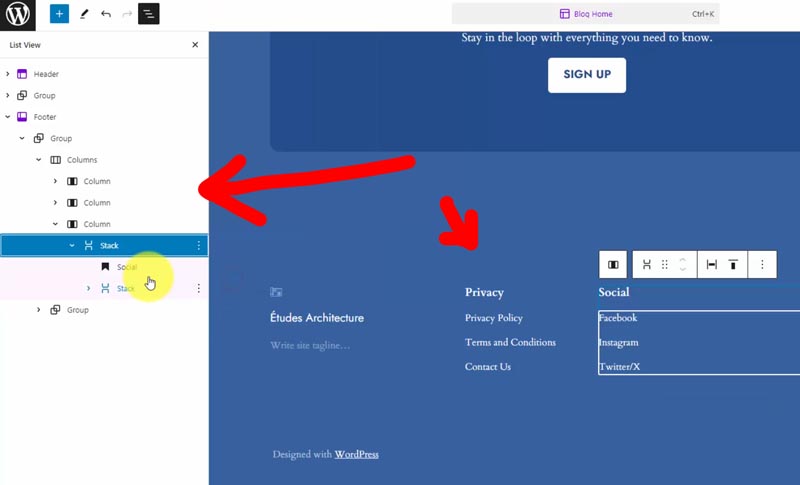
Then, I’ll drag and drop the second Stack into the empty second column, ensuring it’s nested correctly.
In the last column, we’ll drag and drop the last Stack above the Row level, eliminating the need for the row, which you can delete.
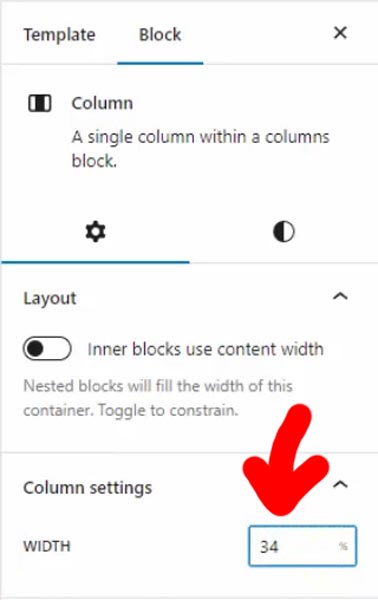
To ensure equal width, I’ll adjust via the Column block settings. The first was set to 30%, the second to 20%, and the third to 50%, which obviously totals 100. I’ll adjust them to 34%, 33%, 33% for equal width.
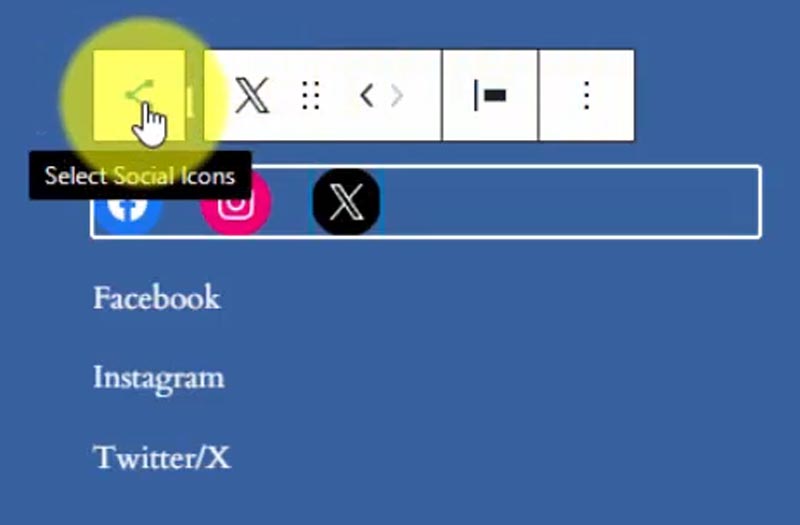
Moving on to the social list, I’ll replace this set of links with the “Social Icons” block. Insert them after the headline, once again simplifying the structure by deleting the Stack block with the social links.
Designing these layouts can be straightforward or intricate for an enhanced design. It takes some trial and error to grasp the different layout blocks like the Group, Columns, Rows, and Stacks.
Once you select “Add After,” you can choose a block by typing the forward slash (/), and then searching for the type of content you want to add.
To add social networks, click the plus (+) button. We’ll include Facebook, Instagram, and X (formerly Twitter). At the moment, WordPress gives you options for both the old and new Twitter icons.
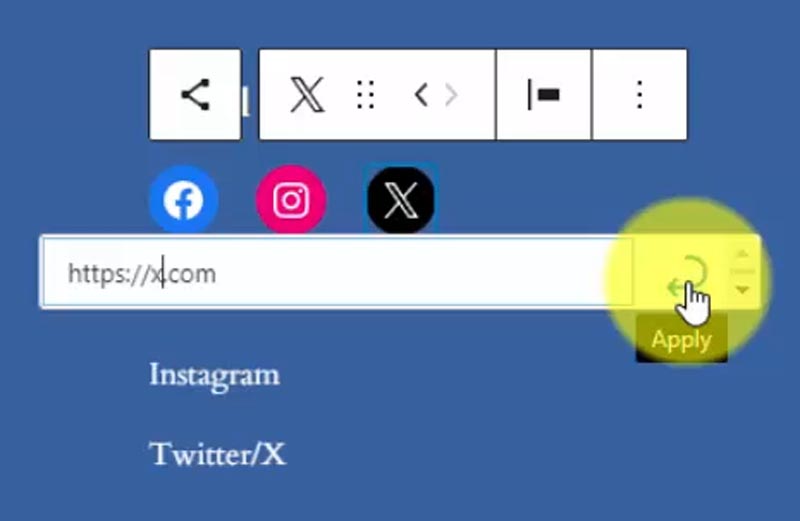
To ensure these icons show up on the front end, we need to link them. Once the links are added, you’ll notice the icons transition from slightly transparent to full color.
With any selected block, the box on the left navigates up one level. For instance, if we’re in the X social icon block and click this box, we’ll return up a level to the “Social Icons” block.
Here, we can select our size. Let’s set it to Large. I also prefer external links to open in a new tab, you can toggle this option in the settings, too.
Additionally, you can change the justification or orientation.
Save Changes Across Your Website
That sums up what I’m doing for the homepage. Let’s save these changes.
Upon saving, it displays the elements updated within your site.
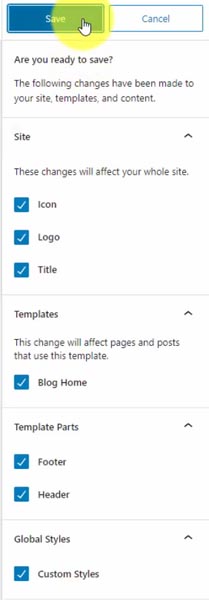
We’ve updated the site Icon, Logo, Title, the “Blog Home” template, the Header and Footer template parts — which will reflect these changes wherever used — and the custom styles that affect your entire site.
Save it and take a look at the front end by refreshing the page.
Edit a Template Part Only
Let me guide you through an alternate navigation method to access a template part like the Footer for a quick fix.
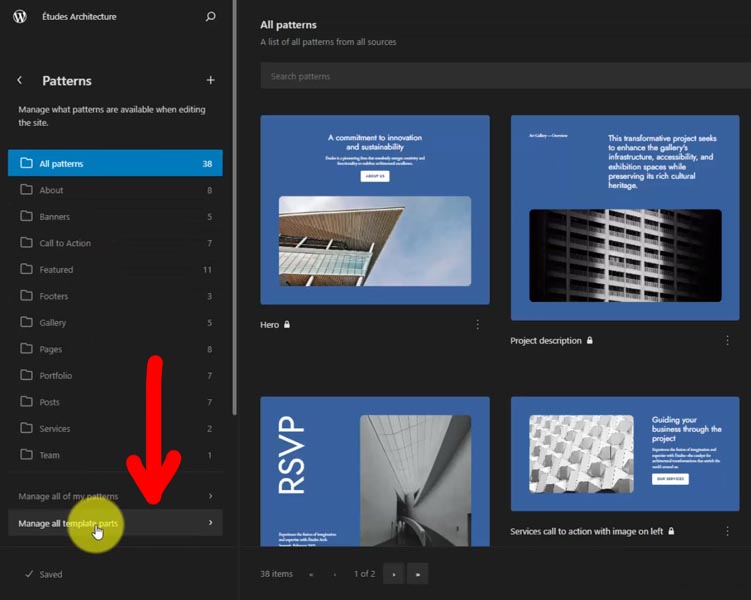
Going back to the “Appearance > Editor” landing page, and select Patterns.
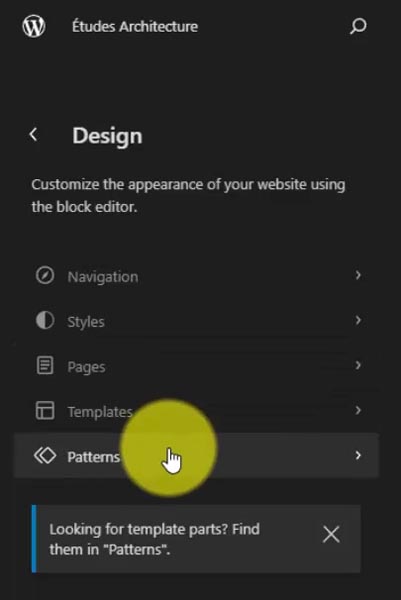
Look under the pattern categories and click “Manage all template parts.”
I’ll head into our Footer template part and the editor window displays the footer only.
Save your template part, and go check out your changes on the live website.
It’s quite amazing how swiftly you can craft something beautiful with these premade layouts!
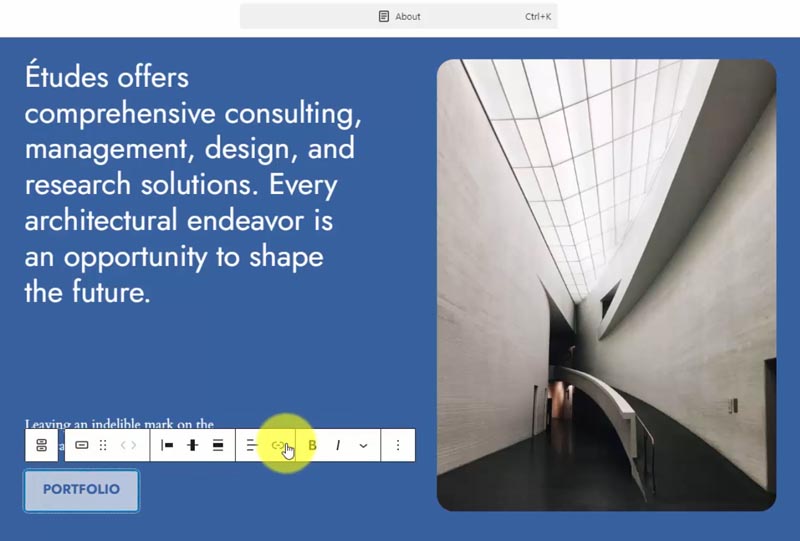
Edit “About” Page Content
Returning to our template editor, I’ll look up the About page from the top-center navigator.
Clicking on any locked item presents this notification — “Edit your template to edit this block.” The Pages template controls the common layout of all your WordPress pages, such as the page title and featured image.
For this task, we’ll focus solely on editing the content of the About page.
Currently, there’s a button named “About Us,” which seems irrelevant on this page! We’ll change this to “Portfolio” and link it to the portfolio page by searching & selecting it.
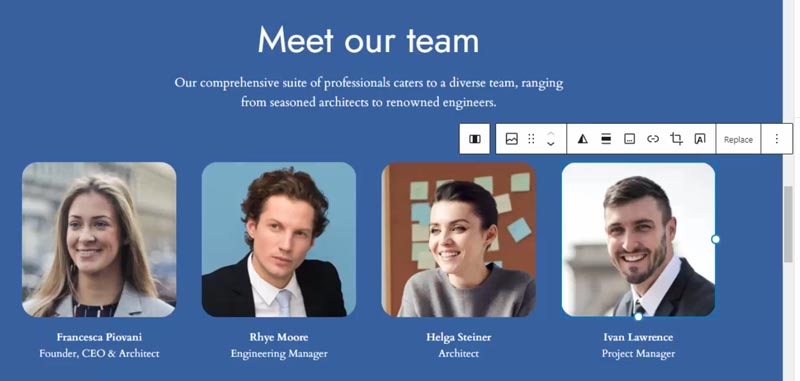
Now, let’s move down to the team images.
I’ll add them from the media library. We have Francesca, Rhye, Helga, and Ivan, and as I pick the faces for each name, I think they match pretty accurately. What do you think? 😆
Let’s save this now.

Edit “Portfolio” Page Content
As we’ve mentioned, you have the option to edit your pages directly from the template editor. Since we did this with the last page, I’ll edit this one right from the Pages section from the WordPress admin menu.
Our portfolio layout is done from the pattern that we imported upon publishing at the beginning, so all we need to do is fill it with photos.
The only thing I’ll update on this page is to transform the Heading block to a paragraph, reset the size (to make it smaller) and center it.
On the right-hand side within our settings, you can set the image aspect ratio and the scale, which is currently set to cover so it’ll fill the entire area.
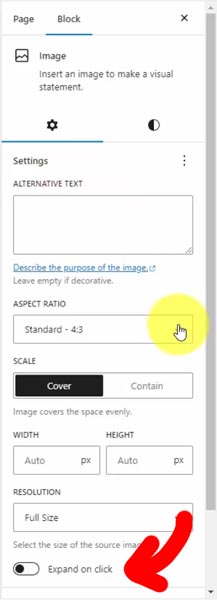
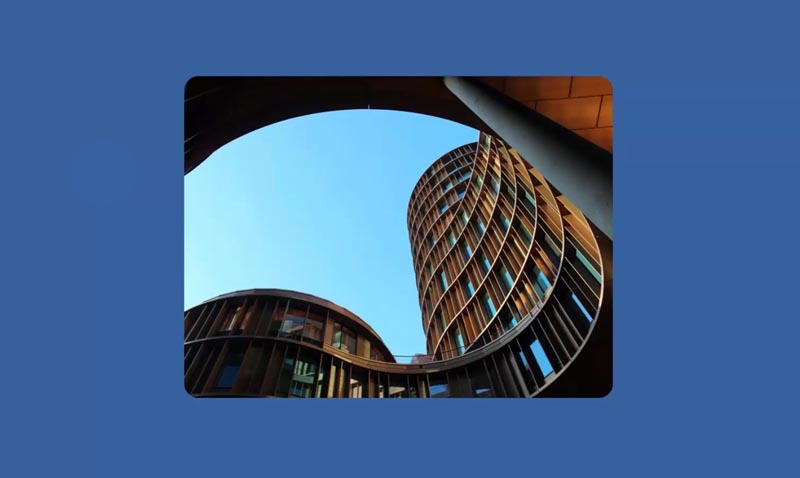
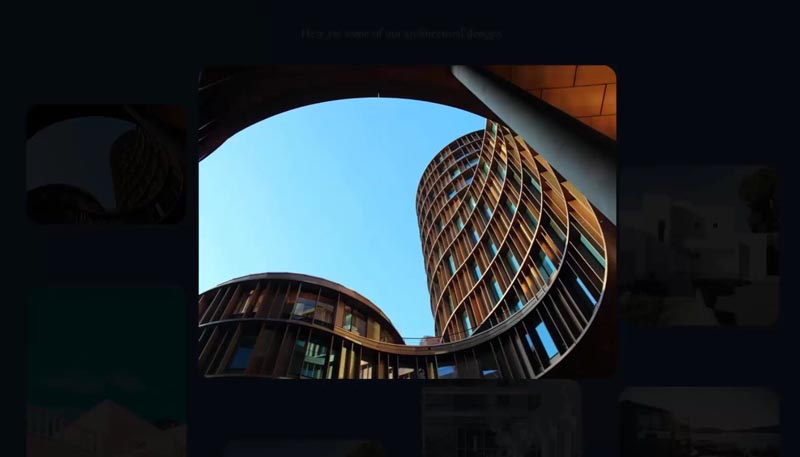
There’s also an awesome new feature in this version of WordPress – a built-in lightbox. Enabling this will expand the photo on click, eliminating the need for plugins or external JavaScript libraries like FancyBox.
Image “Expand on Click” with Custom CSS
Hovering over the photos, you’ll notice a little icon on the top right and the cursor becomes a magnifying glass. This signifies the expand-on-click feature. When clicked, it’ll open the image in a full-size popup window, overlaying the background with your WordPress Styles base color.
Now, let’s dive into how to use custom CSS to tweak this feature. To start, I typically use the Google Chrome inspector.
Right-clicking and selecting “Inspect” brings up that element in the inspector window and shows you the raw HTML code behind the site. This tool is invaluable as a web designer to help you locate and modify elements on your browser before making any edits to the live website.
Hovering over elements highlights them on the page, making it easier to identify where styles are set.
In this case, the background color (blue) is set within the <div class=”scrim”> element. It’s using our preset base color variable set within the WordPress styles.
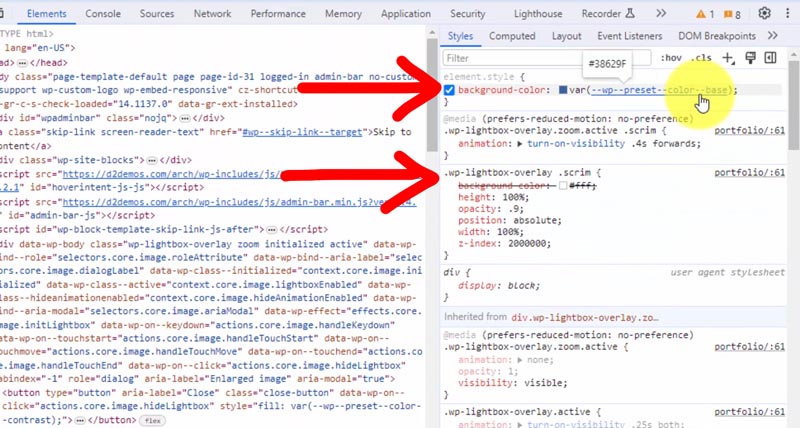
I want to overwrite this so it’s black and slightly transparent.
You can target an HTML class in CSS by using the dot (.) selector before the class name. The element we’ll target via CSS is the “scrim” class within a parent element with the “wp-lightbox-overlay” class.
When applying the CSS, we will set the background-color property using the rgba() function to input red, green, blue, and alpha (transparency) values. Then we will give our style precedence by using the “!important” property to overwrite the default inline style.
Although this might sound complicated, it’s straightforward when you see how easy it is to copy and paste this one line of code below.
/* Portfolio */
.wp-lightbox-overlay .scrim { background-color: rgba(0, 0, 0, 0.9) !important; }
To add custom CSS to your WordPress theme, you’ll need to navigate back to the template editor and show the Styles.
Within the Styles menu, click the three-dot icon and select “Additional CSS.” Here, you’ll find the text box for writing or pasting CSS code.
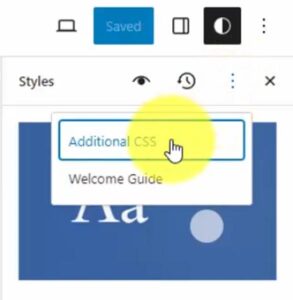
Go ahead and copy the code above into your Additional CSS, then save and test it out!
Remember, when you can’t figure out how to do something with the visual editor, custom CSS can give you more fine-grain control.
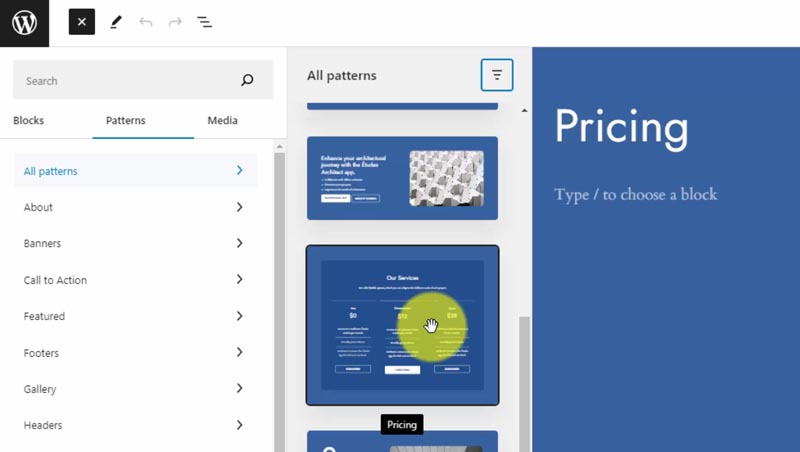
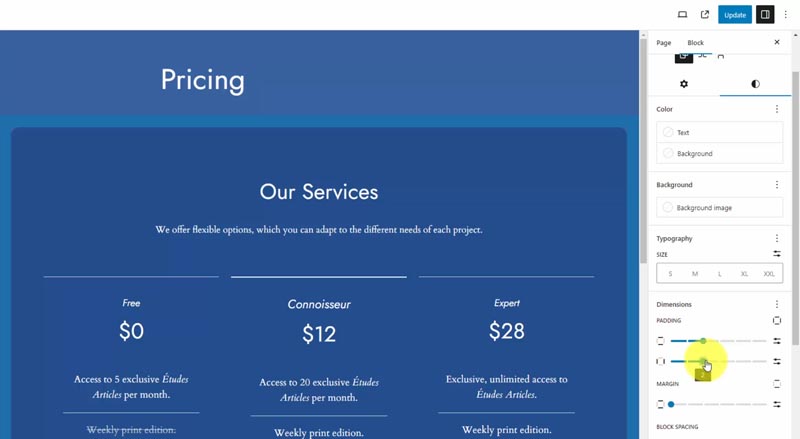
Edit “Pricing” Page
The last page we’ll tackle is the pricing page, so open it up in the template editor or Pages section. To access the pre-done pricing table, click the plus (+) button and choose “Browse all” to view previews of all available patterns.
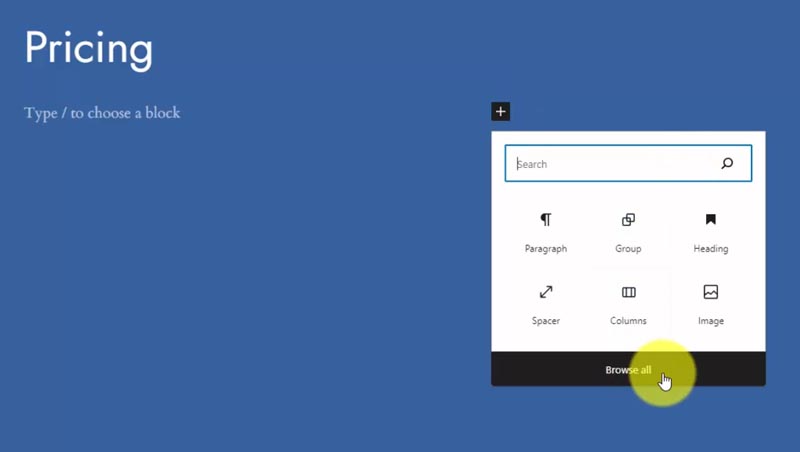
The pricing pattern layout gives you a solid structure for displaying three primary services or packages.
The only modification I’ll make is adjusting the padding. It’s currently set to 5 for top, bottom, left, and right. Let’s change that to 2 to tighten up the spacing.
Conclusion
Go browse through your entire website now — you should be impressed!
The layout looks incredibly professional, achieved in a fraction of the time it would have taken just a few years back using the old WordPress theme system without full-site editing.
Almost every time WordPress releases a core update, it seems like there’s a tweak in the backend, a change, or new features added to the visual template editor.
The exciting thing is that all these features are free with the Twenty Twenty-Four theme.
In the past, such functionalities were exclusive to those purchasing premium themes. Now, WordPress is increasingly integrating visual drag-and-drop design capabilities into the core software.
As always, the best way to learn is to dive in and start building your own website.

Launch with HostGator
Setup WordPress in minutes! 👇
Start NowI may earn a commission if you purchase using my links which helps support this website.
Your WordPress website is an incredible and cheap playground where you can experiment with these remarkable tools (plus the cost of domain & hosting) to create something that truly reflects your vision.