
In this article, I’ll show you how to create your custom domain email within your free personal Gmail account.
One thing I’ve learned from managing client websites is that email can be a distributed mess. What I mean is they use all types of services, including Comcast, Outlook, Yahoo, Thunderbird, and even AOL!
I currently use Gmail and knew early on that I wanted one Gmail inbox for everything. I didn’t like logging into separate accounts to accomplish the same task. And you can do this from multiple addresses.
Log in to cPanel

cPanel is a widely used web hosting control panel that many hosting companies use. cPanel lets you manage your web hosting account, and that includes email.
I’m using this through HostGator web hosting, so if you’re using another hosting provider, you might need to use a custom web host manager with different instructions.
If your hosting company does use cPanel, you can typically log in from your browser at domain.com/cPanel. It should redirect you, but if that’s not the case, then look into your web hosting company’s help documents or your introductory email after signing up for how to log in.
You’ll see I collapsed all the other sections in the screenshot above to leave the email section open.
Email Forwarder vs. Account
One thing I want to mention before we start, in many cases, you can get away with using an email forwarder without creating an actual email account.
This means the email will not be hosted on your web server, and anything that comes in will forward to whatever address you want it to.
The only downside to this is that you won’t be able to send as that email address.
Say you forward to your personal Gmail account, and somebody sends you a custom domain email. If you reply directly to that email, the reply will come from your personal Gmail account (you@gmail.com) and not your custom domain (you@yourdomain.com).
That’s up to you whether you’re okay with a forwarder or not.
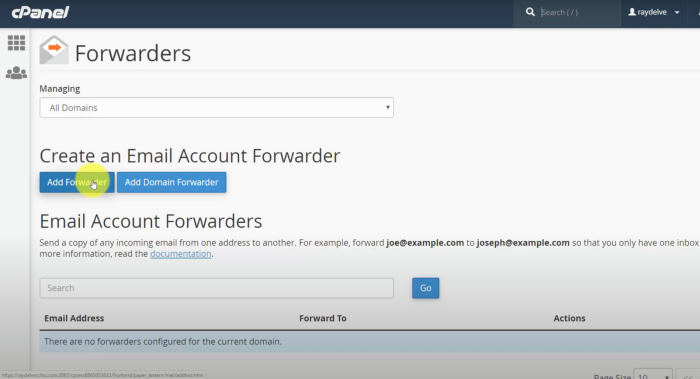
If so, go into the Forwarders section, and click the Add Forwarder button to create a custom domain email address.
You can put it on a business card or anywhere you want to use it, and it’ll forward it to your personal inbox!
Create an Email Account
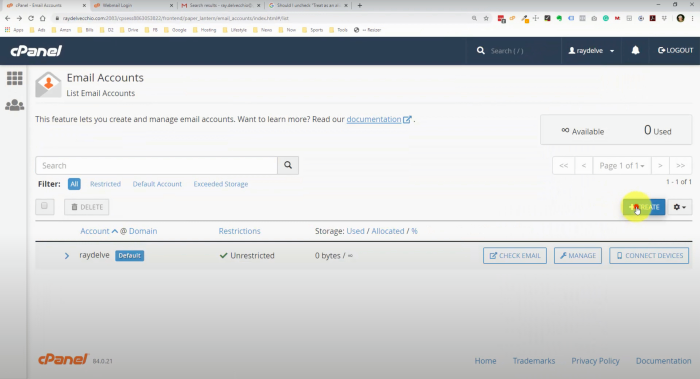
If a forwarder doesn’t work for you, let’s make an email address in cPanel that includes an account where email is stored on your hosting space.
Go into the Email Accounts section and click the Create button.
This is where you set your email address and password. Make sure it’s strong by using their generator, and I recommend using a password manager like LastPass to organize your accounts across the web.
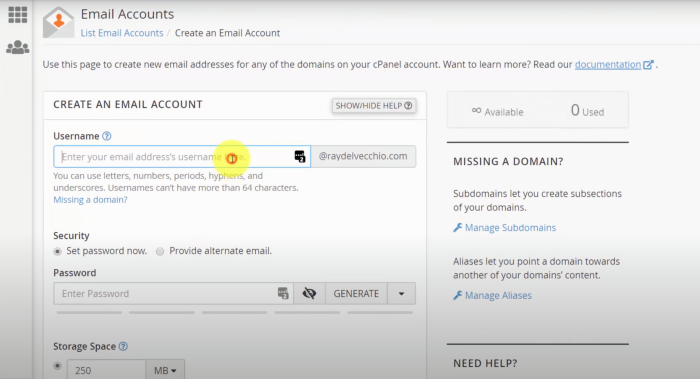
You can set the storage space manually or go with Unlimited. If it’s set to the latter, you should receive a notification if your total hosting account space is reaching its storage limit.
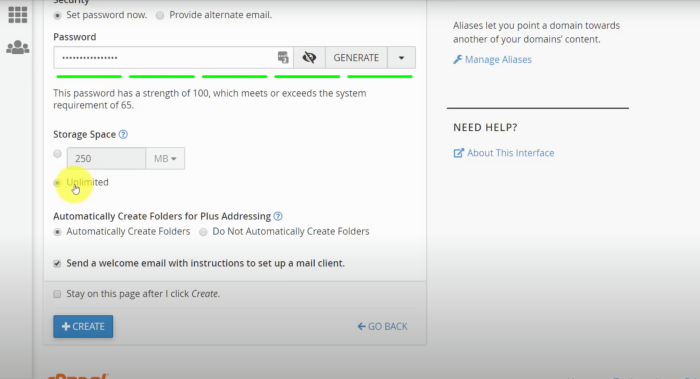
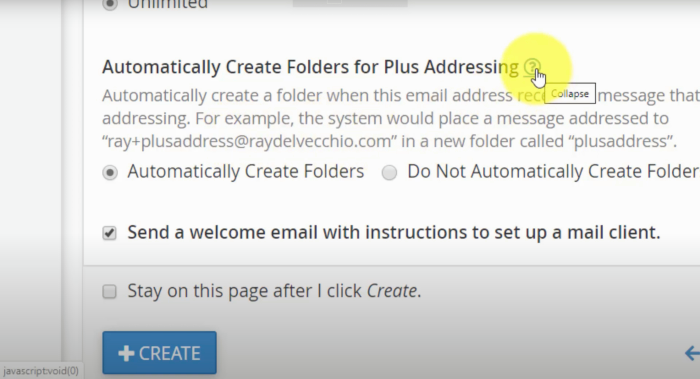
With Plus Addressing, it lets you append a tag to your email so that you can organize your incoming emails into different folders, i.e. you+recipes@yourdomain.com.
FYI, Gmail allows you to use this plus address, too. I leave it on in this example. However, I don’t really use this feature.
Lastly, you can send yourself a welcome email with setup instructions that will include the settings we’ll dig into in a moment.
Click the Create button.
Then on the page that loads once it’s created, click Connect Devices for your new email account. This will take you to a page showing all the settings that we’ll need to get set up in Gmail.
Configure Gmail with Your Email Address
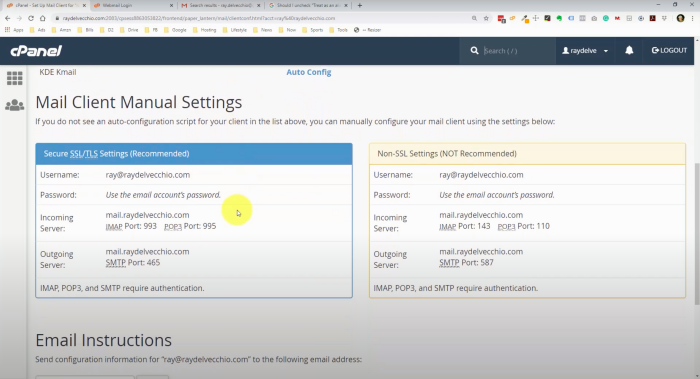
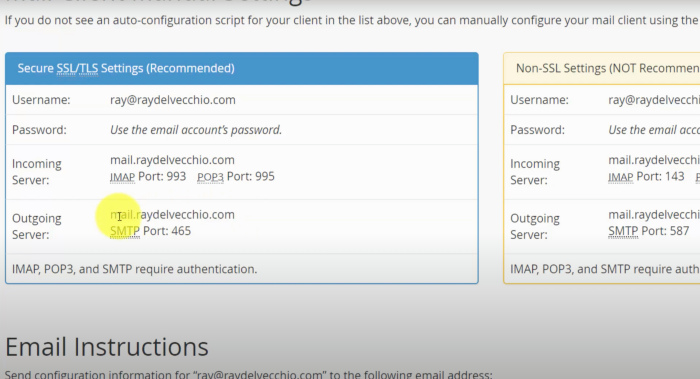
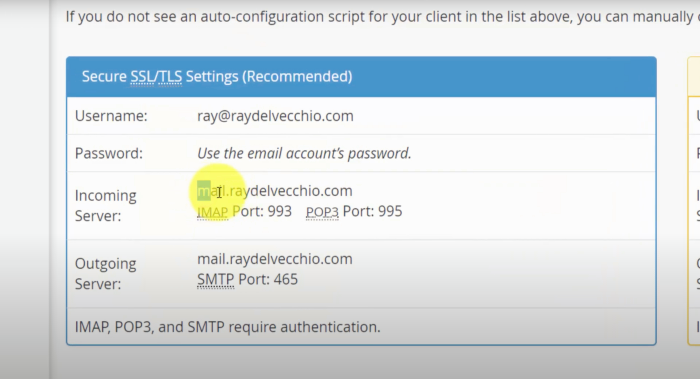
For Gmail, use the Secure SSL/TLS Settings. It’ll show the username (our email address) and you’ll need the password that we should have saved previously.
We also need the Incoming Server settings, which is email that’s coming to you, and the Outgoing Server, which is email that you send.
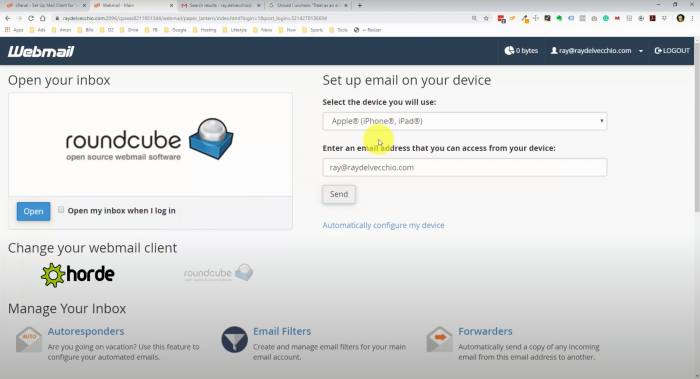
Login to Webmail
Before we go into Gmail, first check out Webmail. which is how you can manage your email without hooking into any 3rd-party email client.
Like cPanel, you should be able to access Webmail from a custom URL, yourdomain.com/webmail/.
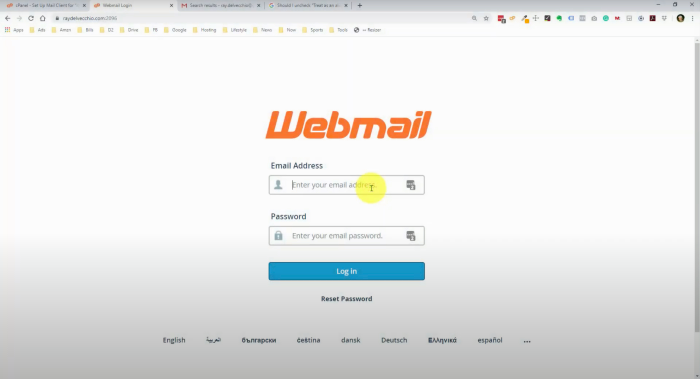
When you first log in, they give you a couple of different mail clients to select – Horde and Roundcube. Select either one, they have the same functions, just with a slightly unique user interface.
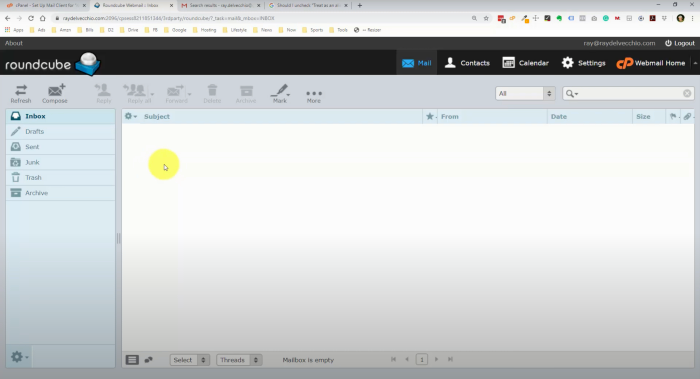
In this example, I selected Roundcube.
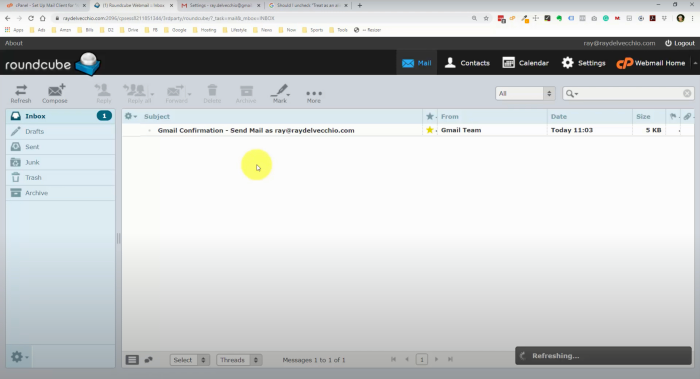
You can see it’s a very simple email inbox. We’ll get a verification email here from Gmail, so leave this browser tab open for now.
Setup Outgoing Email
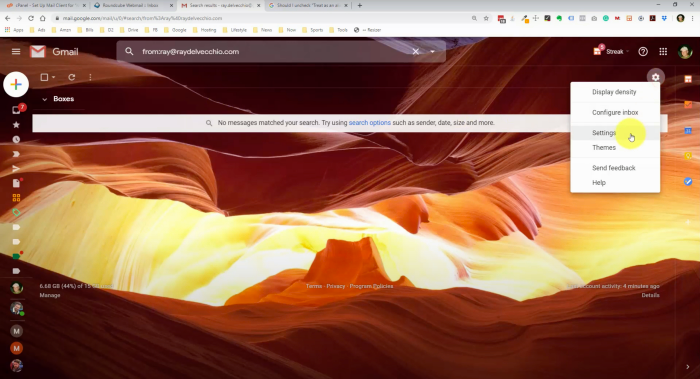
Go into Gmail in another tab, select the Gear icon in the top-right corner and click on Settings.
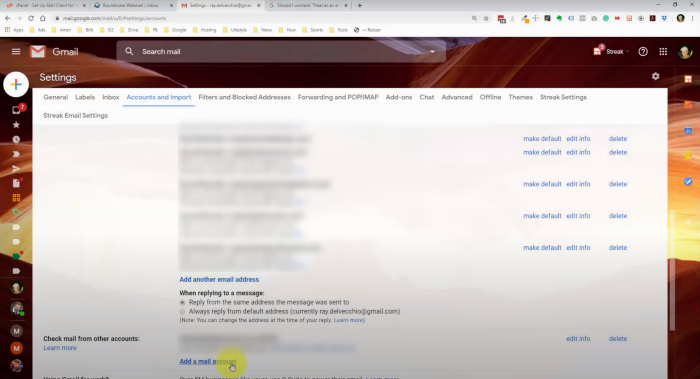
Go over to the Accounts and Import section, and we’re looking for the “Send mail as” section. This is where you set up your outgoing email.
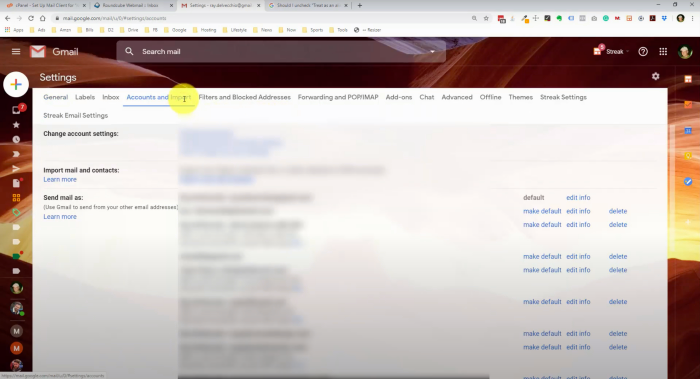
Then the “Check mail from other accounts” settings is where you set up your incoming email.
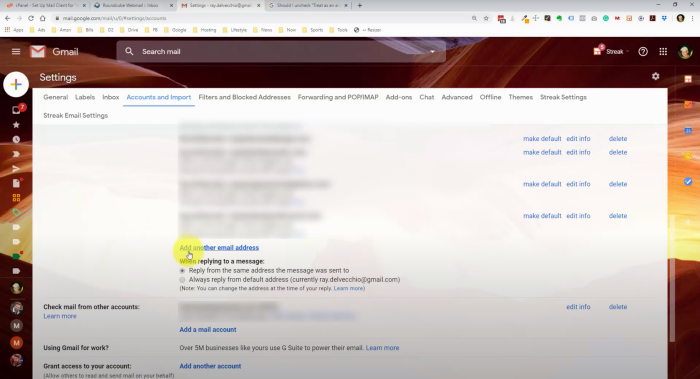
Starting with “Send mail as,” we’ll click on the “Add another email address” link, which will bring up another small window.
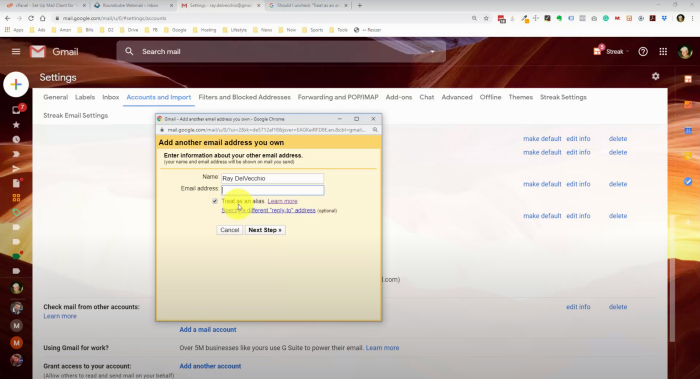
There’s an option here to treat the email as an alias. It took me several times to go through this and truly understand what it meant.
They recently created a much better help page that shows what this option does.
If you have the “treat as an alias” checkbox marked, the example is that you own two email addresses, and you want mail sent from either of them to arrive in the same Gmail inbox. That’s what we want to do!
If the setting is unchecked, you check the incoming mail in a place other than Gmail, but you just want the convenience of sending from Gmail using that address.
I always check this box because I want all incoming and outgoing email to be set up through Gmail.
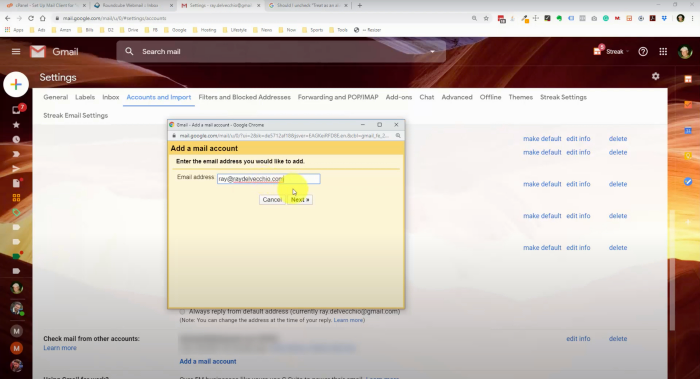
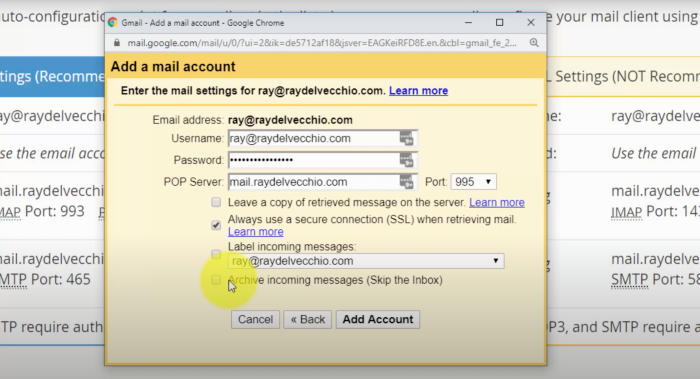
Make sure that the box is checked and paste in your email address.
We configure using the server settings that we previously saw in cPanel. Right now, we need the SMTP Server. Going back to cPanel, you can see that SMTP is the Outgoing Server, which usually is mail.yourdomain.com and the port number is 465.
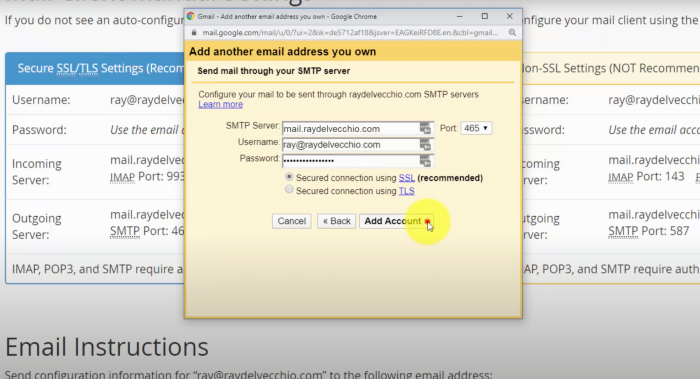
We can go back to the Gmail window, copy/paste your details, choose the port from the drop-down menu, and fill your account info. Leave the “Secured connection using SSL” checked to keep our emails secure, and then click Add Account.
Next, we get a window asking us to verify with a confirmation code. Google wants to confirm that you own this email address, and you can either click on a link within that email or give you a code you can copy and paste into this window.
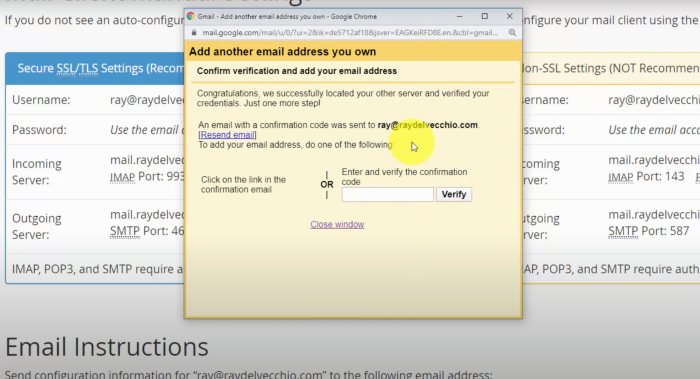
Go back to the Webmail tab we left open, and you should see that verification email. You might need to refresh, but it should arrive quickly. Click the link in the email to activate it with Gmail.
Setup Incoming Email
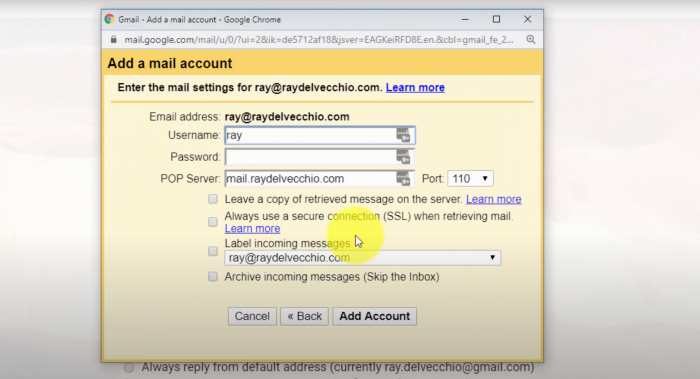
On the next step, we are going to set up our incoming email. Click the “Add a mail account” button under “Check mail from other accounts” to set up our incoming email.
Enter your email address and follow along with the steps.
We’re going to use POP3. Sometimes, when you set up incoming emails, you have a choice between IMAP or POP3.
To put it simply, the main difference is IMAP syncs, leaving a copy of the email on the server, and POP3 downloads (the email is deleted after download). If you select POP3, Gmail downloads an email, and it’ll no longer be available in your Webmail inbox, whereas IMAP will still have them there.
It may depend on your email host, and in my example, I only see POP3 available, so let’s move on to the Next step.

We’ll need to enter more settings from our email host to connect to the incoming server.
Go back to the cPanel settings and look at the Incoming Server section. We need to grab that mail server and then the POP3 Port.
Now paste in your username and password, the mail server, and select the port setting you need. It shows the option to leave a copy, but I didn’t select it. You may choose to do so.
Check the “Always use a secure connection,” and they give you the option to label incoming emails automatically, kind of like earlier. This is a great way to organize if you’re using multiple accounts.
I like to create custom filters within Gmail after setting all this up.
Click the Add Account button.
Test Your Email Setup
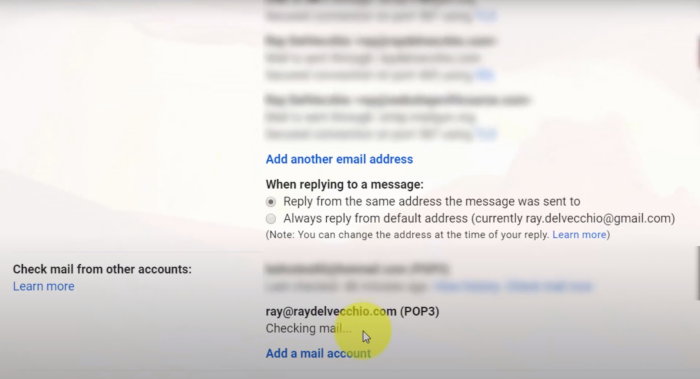
Go back to the Gmail settings and verify that everything is correctly setup. You should see the email name under the “Check mail from other accounts” section and then click the Check mail now link.
It will pull in the verification email we received from Gmail, and show how many emails were fetched.
If you go over to Webmail, you should now see that there’s nothing in that inbox, thanks to the POP3 setup.
Go to your Gmail inbox, and you should see the verification email in there.
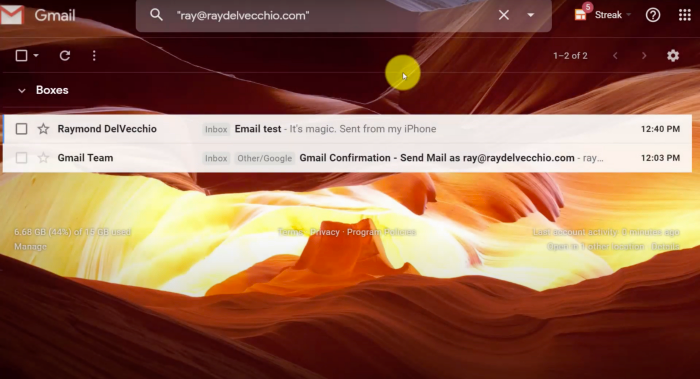
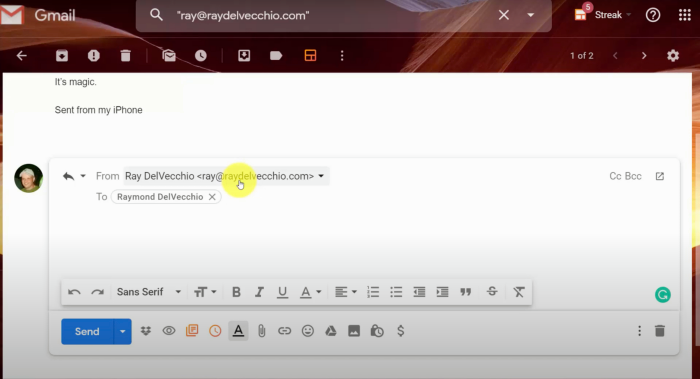
We can do one more test, and that’s to send an email from another account to our new custom domain email. I sent an email from an iPhone account that I rarely use, and you can see it was successfully received within Gmail.
Open the email and hit the reply button, and you’ll see it’s sending from this custom domain name, too, not our Gmail address.
The last step is to go into your General settings and create a custom signature for each email address you manage.
That’s all there is to it, and it makes email so much easier to deal with when you have custom email accounts for 5+ domains.
If you haven’t secured your custom domain name, why not create a blog to go along with your email address? I’ll show you exactly how to do it.