
If you’re experienced with websites or dealing with photography, image file format is something that I’m sure you’ve thought about, but most beginners overlook.
In this article, I’ll go over the simple basics and teach you the difference between the most common formats and how to choose the best one for both quality and file size.
I’m also going to walk you through a few examples of how I use Photoshop to save these images.
JPEG (JPG) Images

The most popular one by far is JPEG or JPG.
Any image that you’ve gotten off a digital camera is likely of this format.
Image formats can be divided into two broad camps being lossy compression and lossless compression. All that has to do with is whether the information within the photo is lost or kept intact.
JPG is a lossy compression method. You have gradients when you’re dealing with real-world images and don’t have sharp transitions like a flat image.
With JPG, you’re able to choose whether you want better quality and larger file size or smaller file size to compress the image data with lower resolution. That’s ultimately going to come down to how you’re using the image.
For the web, I’m shooting for about 100 kilobytes max for a photo file size. When you download a JPEG either from a digital camera or from a free stock photo site like Unsplash.com, they’re giving you the highest resolution photo. Sometimes that’s 5,000 – 6,000 pixels in width or height, which could equal about 5 MB in size.
That’s important if you’re trying to optimize a website and want it to load as fast as possible, especially for people who don’t have the fastest internet connection.
PNG Images

The next file type is PNG. It has uses a lossless compression method, and pretty much is the complete opposite of JPEG.
It’s best for minimal color palettes, such as a logo that will give you the best optimization.
The other cool thing about PNG files is that you can include transparency. They have a channel where you can either do full transparency or a partially transparent portion of the image.
Anytime you have a graphic with well-defined sharp edges and doesn’t have a wide variety of colors, using a PNG file is a great option.
GIF Images
The other filetype that’s similar to PNG is GIF.
You might pronounce it “jiff,” and it’s very similar to PNG in that they’re both lossless compression, and give you transparency.
The primary advantage of GIFs is that you can save multiple images in the file, allowing you to do animations without a video filetype.
File Type Benefits
JPEG
✅ Best for real photos
✅ Lossy compression
✅ Quality vs. file size
✅ Shoot for <100 kB file size
PNG
✅ Best for minimal color palette
✅ Lossless compression
✅ Allows transparency
GIF
✅ Best for minimal color palette
✅ Lossless compression
✅ Allows transparency
✅ Animations
Choosing the Best Image Format
My decision-making process is pretty simple.
If it’s a very complicated image such as a real photograph, I will use a JPEG. I set the quality so the filesize is under 100 kilobytes for web.
If the image is a logo or flat with transparency, I use PNG.
If I need an animation, then I go with GIF.
That’s it!
Optimizing Images in Photoshop
Let’s jump into Photoshop and walk through a couple of examples of images and the editing process.
I always save these files using the Save for web option.
You can go to File > Export > Save for web, or use the shortcut Ctrl-Shift-Alt-S (replace Ctrl with Command on Mac).
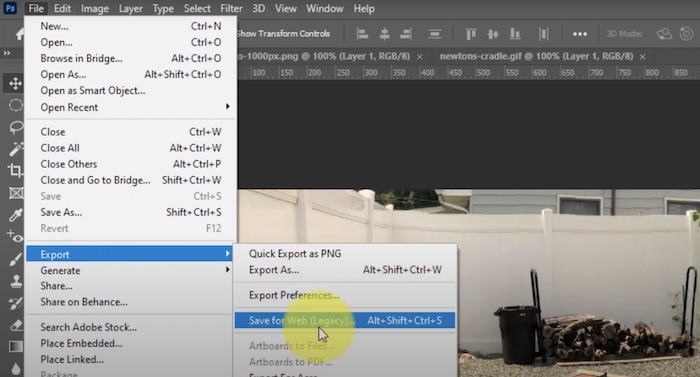
Save for web gives you a preview of the image, and on the right-hand side, this is where you can choose your file type. You can see the setting is on JPEG, and that’s where you can switch to either GIF or PNG.
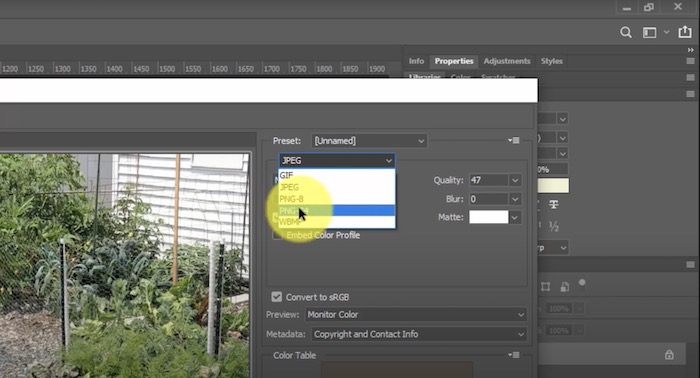
With PNG, you can also select whether it’s an 8-bit or 24-bit PNG. If it’s less color, you can probably get away with a PNG-8 to save space.
Save as a JPEG
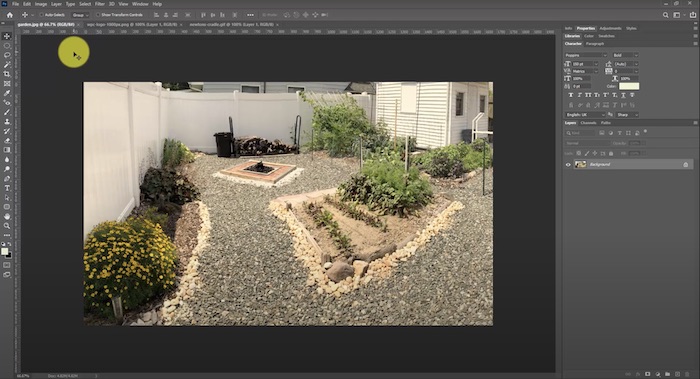
I am starting with a JPEG photo of my backyard garden.
Fun Fact: When I moved in, this entire area was 100% grass. Over two to three years, I turned it into this hardscaped area with vegetables, landscape plants, a fire pit, and I’m still not quite done with it.
On JPEG, you set the quality between 0 and 100. Dropping it down to zero, you’ll see how it pixelates but gives a smaller file size. You can see the file size in the bottom-left of your window as you make adjustments.

Play with it to figure out the right combination, but the quality will depend on the application. For web use, I usually like to make sure images are around 700 – 800 pixels width, and anything more than that is unnecessary unless you specifically want people to download high-quality images or have a massive full-screen banner.
If you’re inserting an image into a blog post or a page, however, then for the quality, I hover between 50 to 60 quality. That is a fair trade-off most of the time.
Some images look pretty good when you’re down at quality 30, whereas others you can tell that they’re highly pixelated, and that might come across as a crappy image.
If you switch to PNG for a real photo, you can see how much bigger a PNG file is versus a JPEG.
With our example, we have 150 kB as a JPEG, and switching over to PNG bumps it up to almost 900 kB.
Save as a PNG

Next, let’s look at an image with a limited color palette. In this example, we’re going to use the logo for my website.
I created this, and I’m very basic when it comes to graphic design. I got into websites through code and learned Photoshop as a freshman in college. It was one of my favorite classes because I thought Photoshop was the coolest software that I had ever used.
I’m not even close to a professional graphic designer, and that is by far what takes me the longest time during any web design workflow. So eventually, I transitioned to doing almost all my graphics as flat images for simplicity.
Obviously, for my domain name, Website Profit Course, I wanted to combine websites and money. I have the “less than” and “greater than” symbols representing website code with a dollar sign and a little browser window that looks like Safari.
I put this together in like 30 minutes, and it was good enough for me.
This graphic is a perfect example of why you would want to use PNG.
We have rounded edges and transparency around the outside of the image. It’s a handful of colors with no gradients, and there’s no pixelation. It’s a very clear-cut image.
If we go to the save for web menu, we see it’s initially set as JPEG. The background turns white since JPEG doesn’t support transparency.
Compare that to how it looks below set as PNG, which shows transparency as the checkered gray background.
As a JPEG, the logo is 25 kB, and if I change that to a PNG, our size drops down to 17 kB.
That shows you how PNG is more optimized for these simpler images.
Save as a GIF
Now let’s look at a GIF. Here we have a Newton’s Cradle image from a Wikipedia page.
When you import a GIF into Photoshop, every frame within that image will turn into a layer.
Open up the Window menu and click on Timeline. That’ll bring down the timeline to see the individual frames.
Adjust the delay between each frame, and decide whether you want to loop it once, a handful of times, or loop it forever.
New Image Format (WebP)
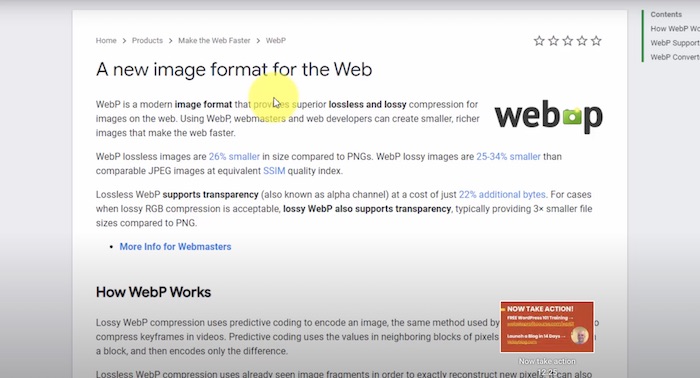
Before I end here, I want to mention one more file type that is very new. I’ve only seen it in the last few years on websites.
It’s called WebP, and Google developed it. What’s cool about this is that it combines both lossless and lossy compression into one extension.
On average, they say that it is 26% smaller compared to PNGs and 25 – 34% smaller than JPEGs.
WebP is something to keep an eye on in the future, and there may be plugins to convert your existing filetypes on the fly.
I hope this simplified the entire subject of which filetype is the best in every situation!