

Today, we’ll delve into a technical feature that’s a part of most web servers, and that’s FTP or File Transfer Protocol, and how it allows you to edit files on your WordPress website.
FTP is a method for moving raw files between your computer and web server.
Download an FTP Client Application
You can choose from several FTP programs for Mac & Windows, but my favorite is FileZilla Client.
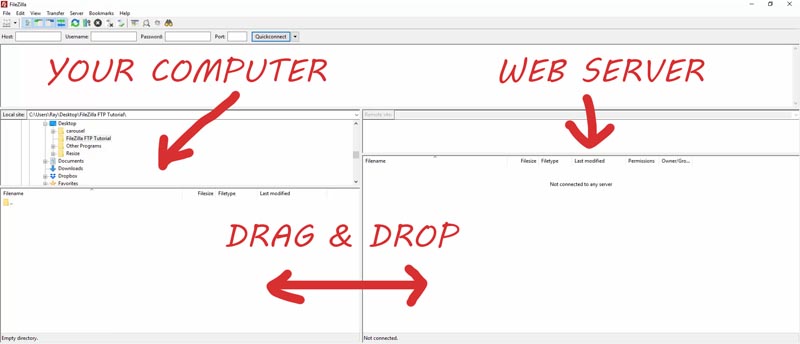
When you open FileZilla, you’ll see two panels – the left side represents our computer, showing various folders. On the right side, that’s where you’ll see your web server folders and files once you connect.
Let’s establish a connection.
To do this you’ll need your web server account details, which you can find by logging into your web hosting provider.
That’ll include:
- Hostname (often your domain name)
- Username
- Password
- Port number
You can use the “Quickconnect” bar at the top of the screen or go to File > Site Manager (left icon right under the “File” menu option) to save this info for future use.
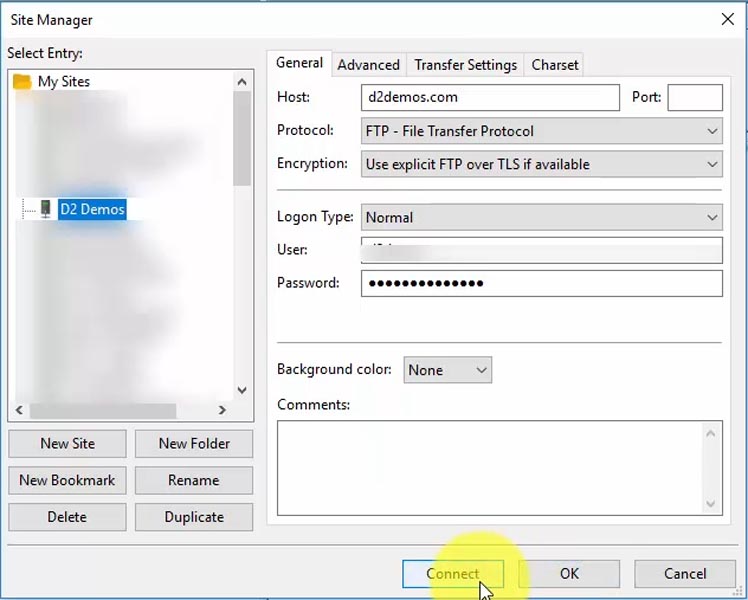
Hit the “Connect” button, and you’ll now see the web server files loaded into the right panel.
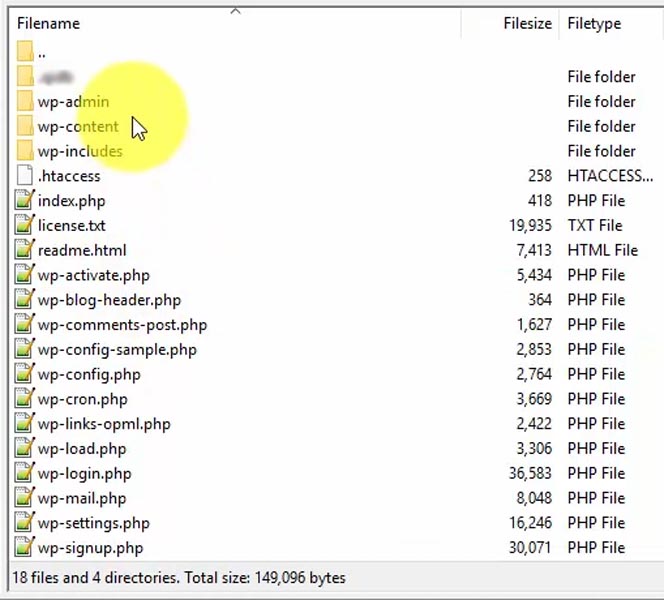
This is what the WordPress file structure looks like with three main folders — /wp-admin, /wp-content, and /wp-includes. Then there are a bunch of PHP files that generate both the website and backend to manage it.
We’ll walk through the process of installing a WordPress plugin and theme the manual way.
You can grab these raw WordPress files from the plugin directory and theme directory.
Installing a WordPress Plugin via FTP
Pick one like Akismet. When selecting plugins, I recommend you choose ones that have high ratings and are popular since they’re far more likely to run smoothly and not cause conflicts with other PHP files like we saw on our server.
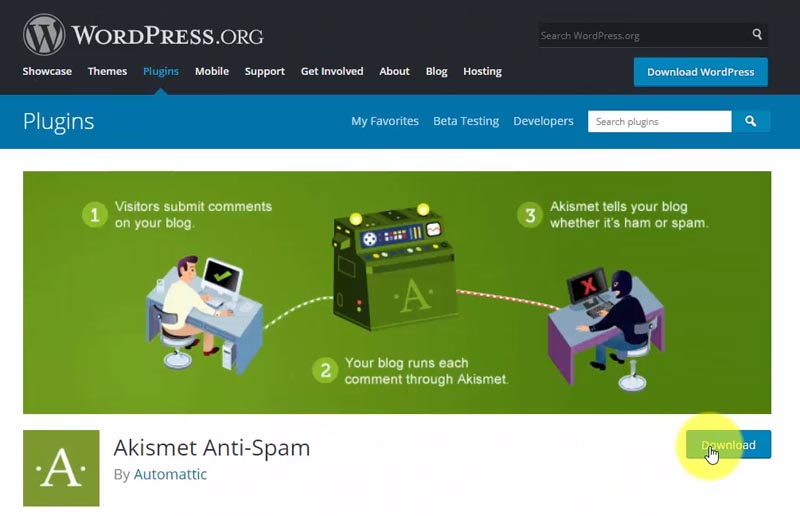
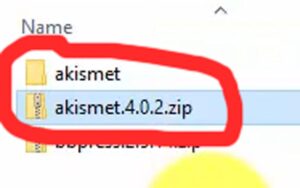
Hit that download button, and you’ll get a ZIP file with the plugin contents. Keep in mind that plugins are modular, and one plugin = one folder. Unzip and move this folder to your computer.
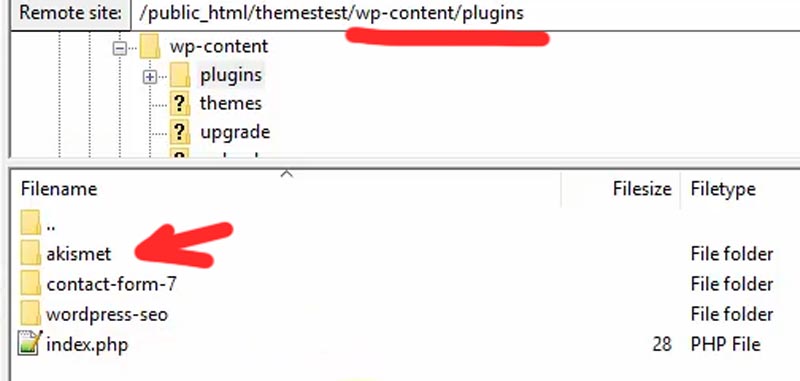
Now, head back to FileZilla, and navigate to the /wp-content/plugins folder where you’ll upload your plugin.
Drag and drop the Akismet folder from your computer on the left panel, to your web server on the right panel.
Go back to your WordPress admin area and navigate to the “Plugins” page, and behold – there’s our Akismet plugin!
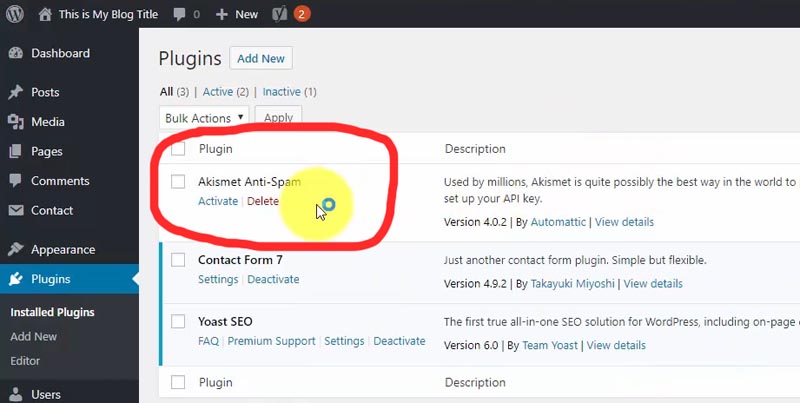
All you have to do now is activate it.
If you’d like to get adventurous, you can even create your own WordPress plugin and upload it directly to your site!
Installing a WordPress Plugin via FTP
Let’s go through this similar process with themes.
Go to the WordPress theme directory, and I’ll pick a random one to test. However, I still recommend you choose a popular one for the best features, especially ones that enable block editing with your templates!

Hit download, unzip, and let’s open FileZilla.
On the web server side, navigate to the /wp-content/themes folder. The same idea with plugins applies here, one theme = one folder.

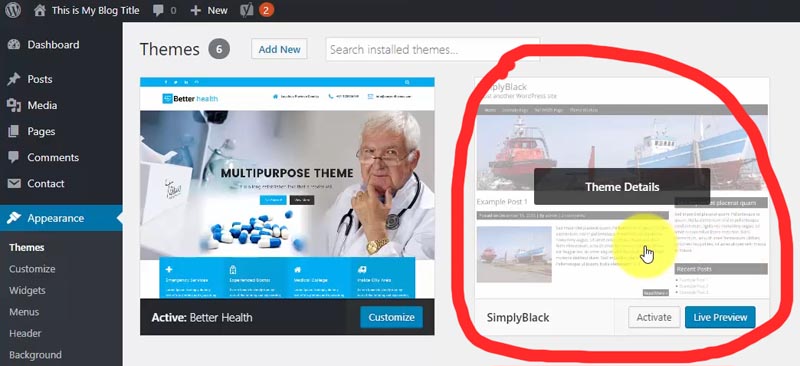
Drag and drop the theme folder, and jump back to WordPress. Go to Appearance > Themes, and activate it.
Not too difficult, right?
Overwriting a File in the WordPress Media Library
The next thing we’ll discuss is how to update a media file.
Picture this scenario – you’ve included an image in the media library on a post or a page, and you want to give it a refresh. Instead of maneuvering through the WordPress interface, re-uploading, and saving the post, can you simply drag and drop the new file to replace it?
The answer is yes. However, keep in mind that WordPress does auto-resize image uploads, and sometimes, plugins will create optimized versions of files, so there may be limitations to this FTP overwrite method.
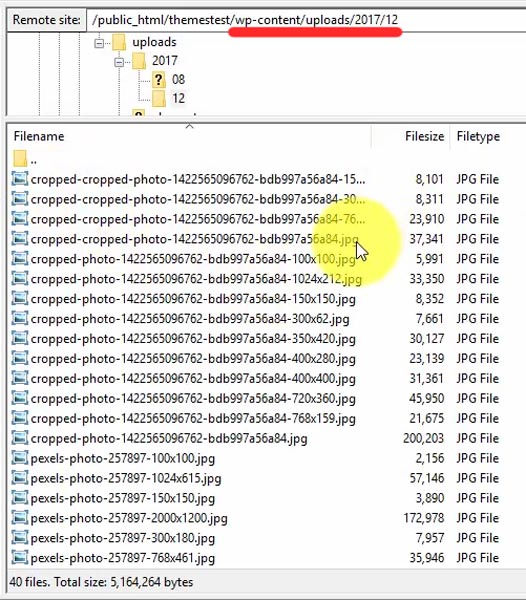
Head to the /wp-content/uploads folder in FileZilla, where your media library files reside. By default, they get put into a folder hierarchy based on the year and month of upload.
You probably won’t remember this off the top of your head, so use Google Chrome Inspector to view the image URL on your live website, or copy/paste the image link.
When you go to the image folder, you’ll see the resized versions in addition to the original.
As long as the original version is inserted into your WordPress post or page, you can upload the new image and overwrite it. Remember to clear any cache, too.
View or Customize Theme Files
Now, let’s explore how to customize your theme through FTP.
A child theme is an extension of a “parent” theme that you choose from the WordPress theme directory. It’s sole purpose is for you to build on top of the features that exist on the parent theme.
Here’s where it helps to understand the WordPress template hierarchy, which is a flow chart of which theme files take precedence over others.
You use FileZilla to copy any file from the parent theme to your computer. Then you can edit or add to any part of the code, whether it’s PHP, CSS, or JSON, and re-upload this customized file to your child theme.
If you go back to the top level of your WordPress installation on FTP, one crucial file is wp-config.php. This contains the MySQL database connection details on your web server along with other default settings.
When you install WordPress with one click, all of these little tasks, like creating the database and adding the credentials to wp-config.php, are done automatically for you.
The beauty of WordPress (unlike most other web design frameworks) is that it’s 100% open-source. So you can transfer any file from your web server to your computer with FTP and peek inside with a text editor like Notepad++ to learn code or simply understand how everything works like magic!