
Today’s tutorial is for WordPress beginners or intermediate users who want a refresh on the current features.
We will cover all the basics, starting with acquiring your domain name and hosting, while providing a comprehensive tour of your WordPress admin area for how to manage, edit, and customize your website.
By the end, you’ll understand how to use WordPress to manage your website!
Do you prefer to get this tutorial, along with many more, sent directly to your inbox?
How to Use WordPress 101
- WordPress.COM vs. WordPress.ORG
- WordPress Admin Overview
- Core Software, Themes & Plugins
- How to Pick a WordPress Theme
- Create Posts & Pages
- Add Content Blocks & Patterns
- Post Settings & Publishing
- WordPress Media Library
- Web Server File Hierarchy
- Configuring WordPress Settings
- Additional WordPress Tools
- WordPress User Accounts
- Pick Plugins to Add Functionality
- Expanding with eCommerce
WordPress.COM vs. WordPress.ORG
There is one really big point of confusion for beginners and that is the difference between WordPress.com and WordPress.org.
WordPress is open-source software, and you can download the full WordPress framework for free, you simply need to install it on your own hosting account.
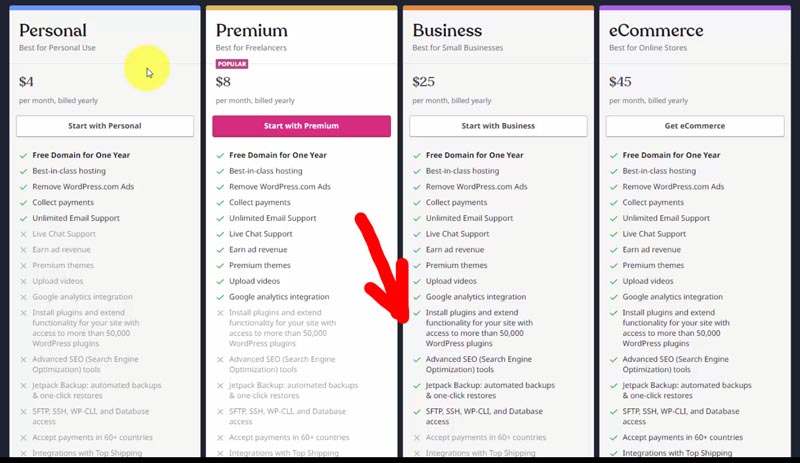
WordPress.com offers hosting services, but I don’t recommend using it because you won’t have access to the full version of WordPress unless you opt for their “Business” plan, which costs $300/year. That’s the level you need to use plugins, which are essential for customizing your WordPress site.
Instead, I recommend self-hosting, which involves choosing a 3rd-party website hosting company that fits your exact performance needs and budget. That gives you every built-in WordPress feature regardless of what you pay.
Most web hosts offer one-click WordPress installation, and you can also download it from WordPress.org as a ZIP file to install it manually.
If you’re looking for an affordable plan to start with, I recommend HostGator, which costs around $100 per year (a fraction of WordPress.com). Even better, their introductory rate is closer to $70/year, and you have the option to extend it for up to three years.
If you are ready to get setup in minutes, use the link below to learn more!

Launch with HostGator
Setup WordPress in minutes! 👇
Start NowI may earn a commission if you purchase using my links which helps support this website.
WordPress Admin Overview
Once you’re set up with HostGator (or any other host) and have installed WordPress, you can access your WordPress Admin area by logging in.
You can get to the login page by going to:
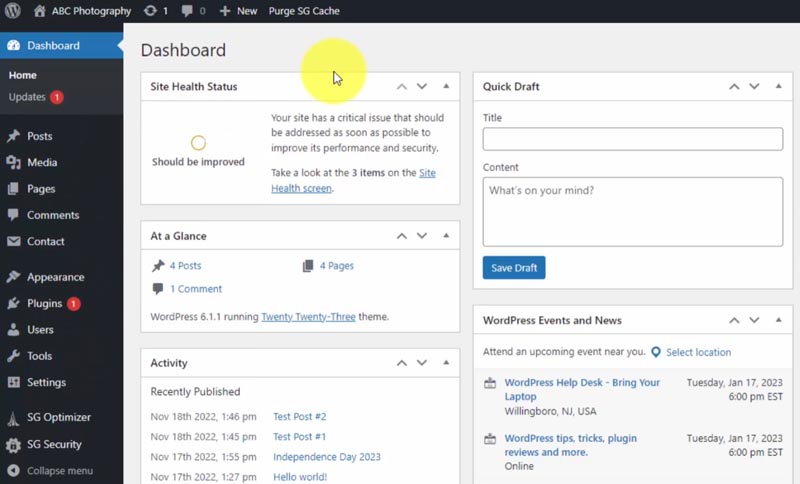
yourdomain.com/wp-adminThis will take you to your WordPress dashboard, which provides an overview of your entire website. They also highlight WordPress events near you if you want to join the local community to learn in person.
You can navigate through the WordPress admin area using the left menu.
Core Software, Themes & Plugins
WordPress can be broken down into three primary categories: the core WordPress software, themes, and plugins.
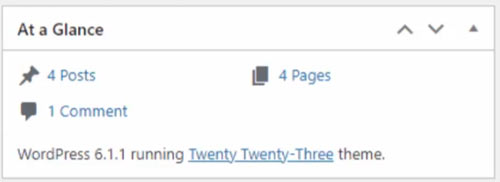
In the “At a Glance” section on the dashboard, you can see the version of WordPress you are running (currently 6.1.1). That is the core software, built with PHP.
Themes allow you to choose the design you want for your website, and you can easily swap them out while keeping your content. Your active theme is the one that generates the layout of your website.
Any web developer can create a theme and have it published in the WordPress theme directory or sell it on their own website.

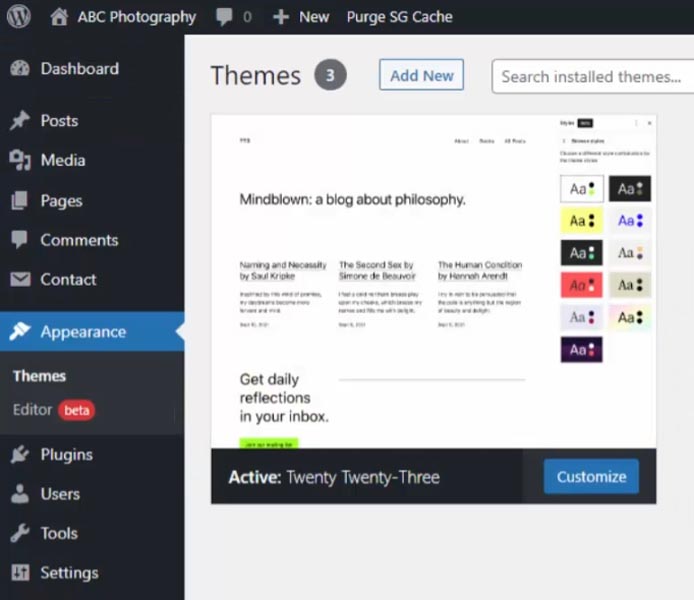
Currently, we are running the “Twenty Twenty-Three” theme, which is free and developed by the WordPress team. Each year, they release a new theme with this naming convention to coincide with a big WordPress core software update.
Plugins enable you to add various functions such as SEO, e-commerce, security, and social media integration. Like themes, these are created by independent developers who decide whether to make their software free or paid.
Updates for the core software, themes, and plugins can be found in the “Update” section, indicated by the red notification when one becomes available.
How to Pick a WordPress Theme
Let’s dive deeper into selecting the best theme for your website.
In the past year, WordPress released one of its biggest updates, introducing full site editing into the core software. This means that you can now design your theme 100% visually, eliminating the requirement of coding knowledge.
To access your themes, go to “Appearance > Themes.” The main difference with a full site editing theme, a.k.a. a block theme, is that you will see the “Editor” submenu.
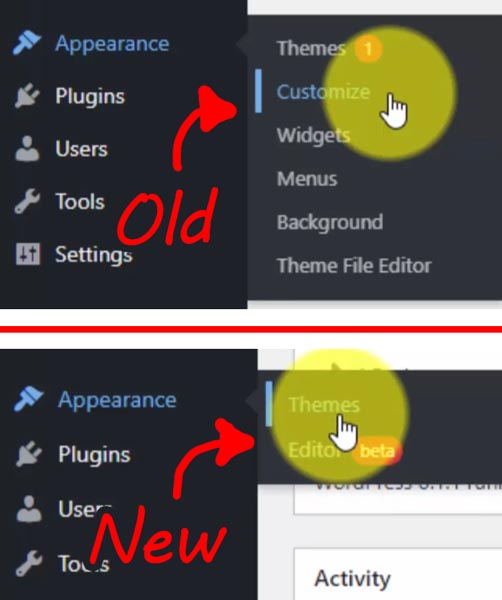
If you’re running an older theme that doesn’t include full site editing, you’ll see more options available under the Appearance sub-menu. The “Customize” section is where the theme developer would put their settings for you to customize.
Now, with full site editing, customization is done in the visual template builder. The same goes for the other options like Widgets and Menus.
Browse thousands of themes by clicking “Add New”. If you prefer full site editing, you can use the “Block Themes” filter.
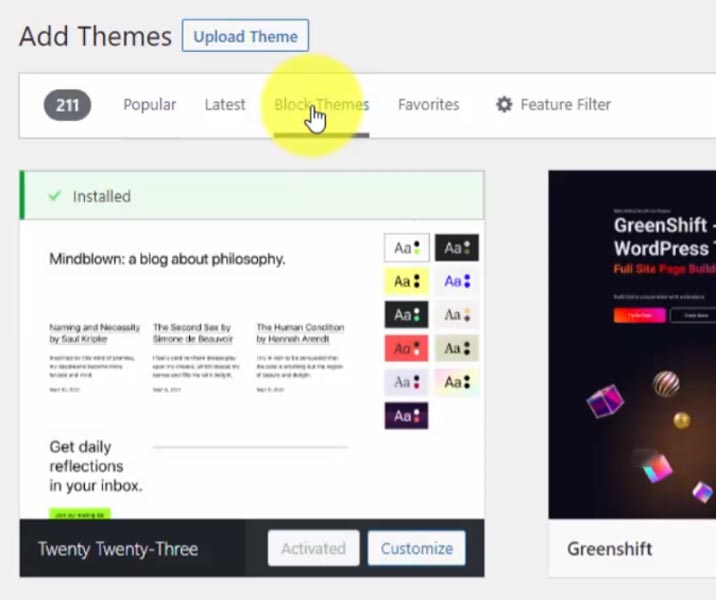
Starting with the theme that WordPress developed, such as “Twenty Twenty-Three”, is a good idea for beginners since it incorporates newer features. And it’s free!
However, you always have the option to test out niche-specific designs or upgrade to a premium theme if you are seeking more capabilities along with professional support.
The theme that runs all of my personal and client websites is Divi by Elegant Themes. They solved full site editing before WordPress, and have many more advanced features for web designers and creative website owners.
Learn more below…
Divi Visual Builder
The #1 WordPress theme on the entire internet to design your website with drag-and-drop!
Buy NowI may earn a commission if you purchase using my links which helps support this website.
If you’re just learning WordPress, it’s wise to start affordably and familiarize yourself with how WordPress works before making a decision.
Create Posts & Pages
The Posts & Pages are where you publish content on your website.
Blog posts are chronological and will appear on the live website in the order they’re published. They also have categories/tags associated with them.
Pages are timeless and are used for pages like About, Contact, and Testimonials.
Let’s jump into a post and view it.
Add Content Blocks & Patterns
With the Gutenberg editor, you create your posts with blocks and patterns.

If you’re returning to WordPress after a hiatus of a couple of years, you might remember the classic editor that resembled Microsoft Word. Now, everything is done with blocks.
To add a block, you can either click the plus (+) button or type a slash (/) to bring up the quick-use block menu. Then select “Browse All” to view every content block from the left menu, such as paragraph, heading, list, quote, images, gallery, audio, etc. They even have a “Classic” block for those who prefer the old functionality with the classic editor.
However, I recommend starting with the block editor for everything. Better to dive in with new features instead of using the old method that may not be supported in the future.
Create your layout and organize your blocks with columns, groups, rows, stacks, separators, and spacers for design.
The block editor makes it much easier to design your content. Each block has its own settings, which you can edit from the right-hand side. Simply select the block and you’ll be able to modify the text, background, link color, and more for that particular block.
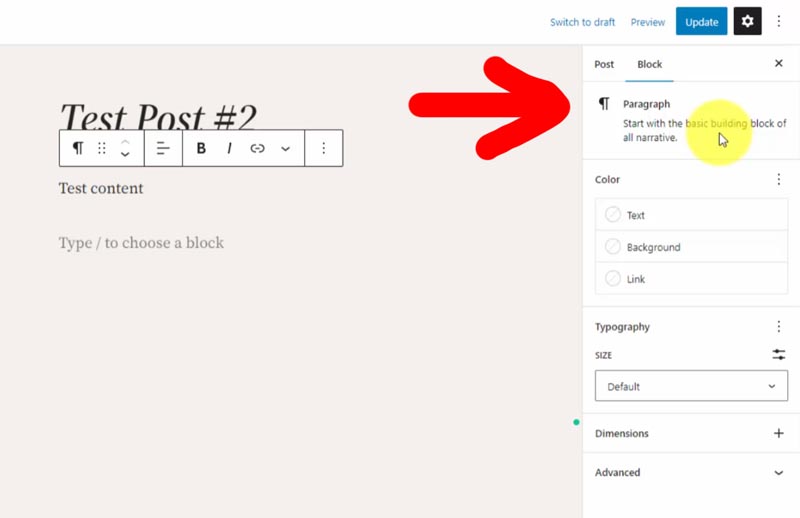
There might be additional settings that aren’t showing, so in that case, you want to click the three-dot icon (⋮). For instance, in the typography settings, all we see right now is the size.
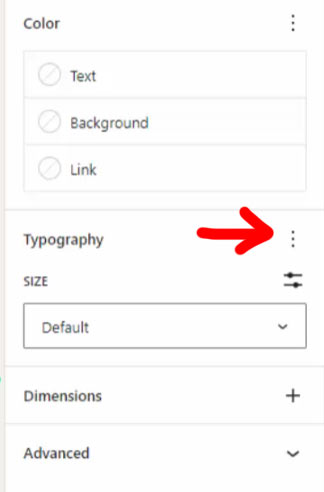
However, if you jump into the settings, you can change the font family, appearance, line height, letter spacing, etc.
Post Settings & Publishing
In the post settings, you can edit the post or page status, URL, author, categories, tags, and featured image.
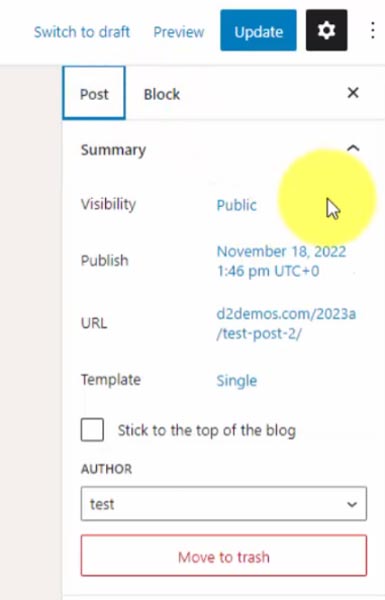
Once you’ve created a blog post or page, you can save it as a draft, publish it immediately, or schedule it to go live on a future date.
You have the option to preview the post right in the editor window on different device sizes, or to get a better perspective, you can open the preview in a new tab.
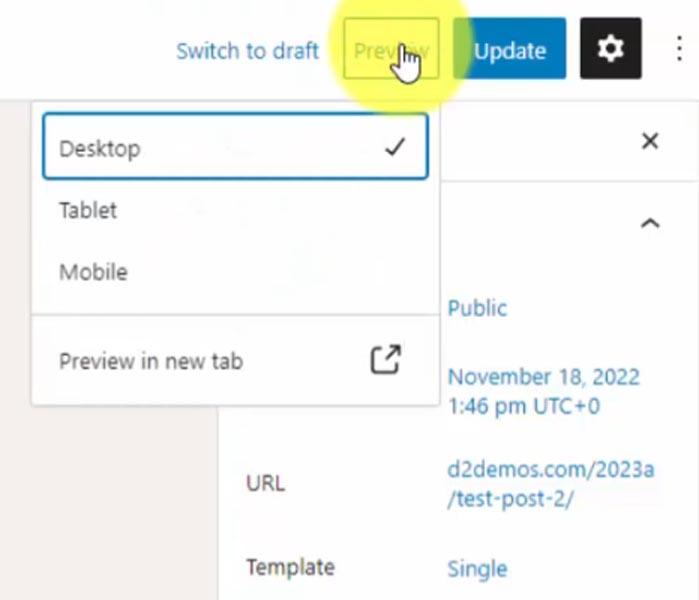
By visiting the live website, you can see exactly how the customizations made to posts and pages are reflected.
That’s a little intro on how to build your content.
WordPress Media Library
When you add photos, videos, or other attachments (i.e., PDFs) to your pages and posts, they are uploaded to your Media Library. You can view all uploads by navigating to the Media option from the left admin menu.
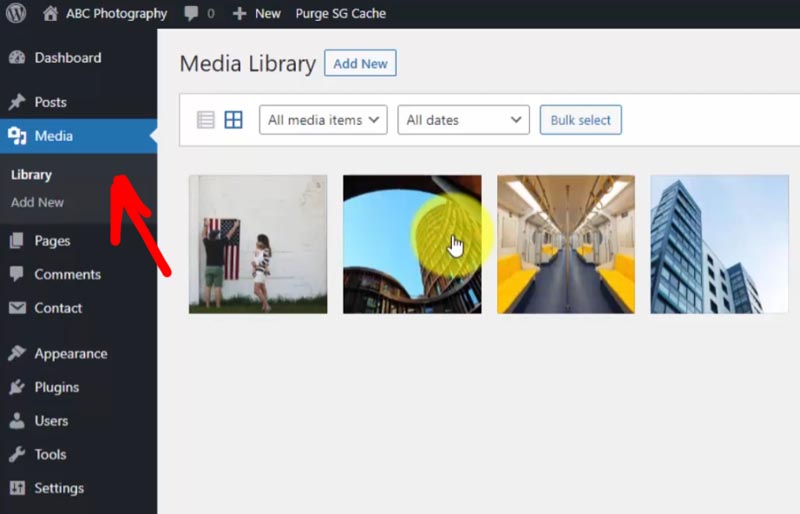
You can either upload your media directly within pages and posts or if you want to bulk upload, you can do it from this section and then insert them into your pages and posts after.
Once you upload, click on an image to see its details, such as the direct image URL.
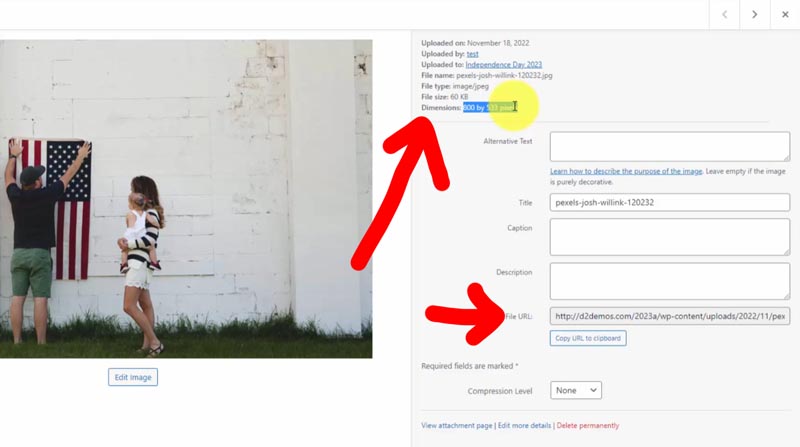
I recommend making sure your dimensions are appropriate for a website. You don’t need to upload something that is 5,000 pixels wide. That will just eat up your web hosting resources and make your site slower. I resize all images to <1,000 pixels. WordPress also generates medium and thumbnail sizes that you can insert instead to optimize even more.
Web Server File Hierarchy
You might be wondering where these files go within your web hosting account.
For that, I have another tutorial diving into the more technical side of how WordPress operates, where you can see the PHP files that run everything. It’ll teach you about the File Transfer Protocol (FTP) and show you exactly what a WordPress installation looks like on your web server.
Configuring WordPress Settings
We’ll start with the general WordPress settings.
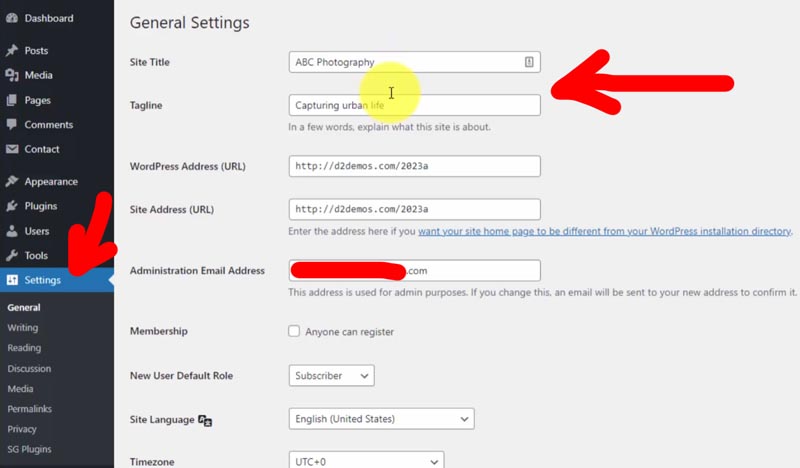
This is where you can set your title and tagline, and then you can insert those snippets into your template with blocks.
It’s also where you set your admin email address, along with the default time zone and format.
Reading — Custom Homepage
Next up is the reading section. This is where you set either a static home page (my preference) or, by default, WordPress shows your newest blog posts on the home page.
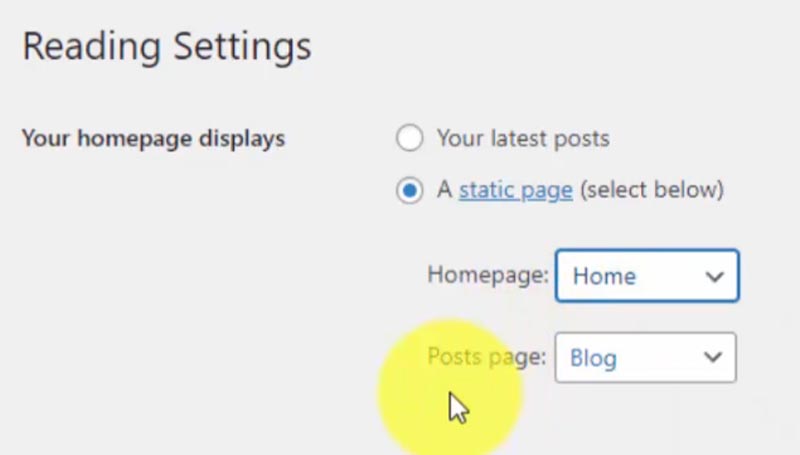
You can select the “Your homepage displays” option and set it to a static page. It’ll have a drop-down of all your published pages, and you can select which one to set as the homepage.
In the “Post page” section, you can choose the page where your blog posts will be displayed.
Discussion — Manage Comments
The discussion section is where you have all your commenting settings.
I recommend that you require a user to log in to comment because WordPress websites are known for attracting spam bots that submit comment forms looking to insert their links on your website!
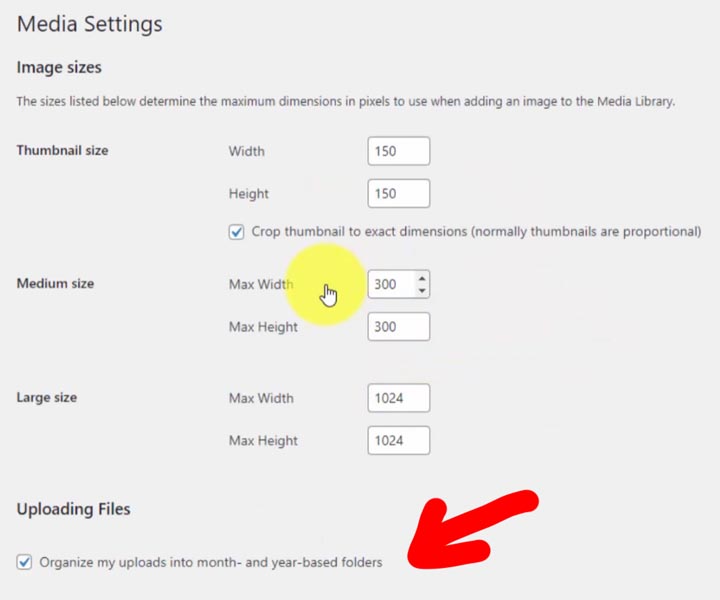
Media — Upload Defaults
The media section is where you can set your default sizes on media uploads. WordPress organizes your media into folders on the web server based on the year and the month, unless you uncheck this option.
Permalinks — URL Structure
Arguably the most important setting is the permalinks. This is your URL structure across the entire website, and this is what Google logs when adding your website to their index.
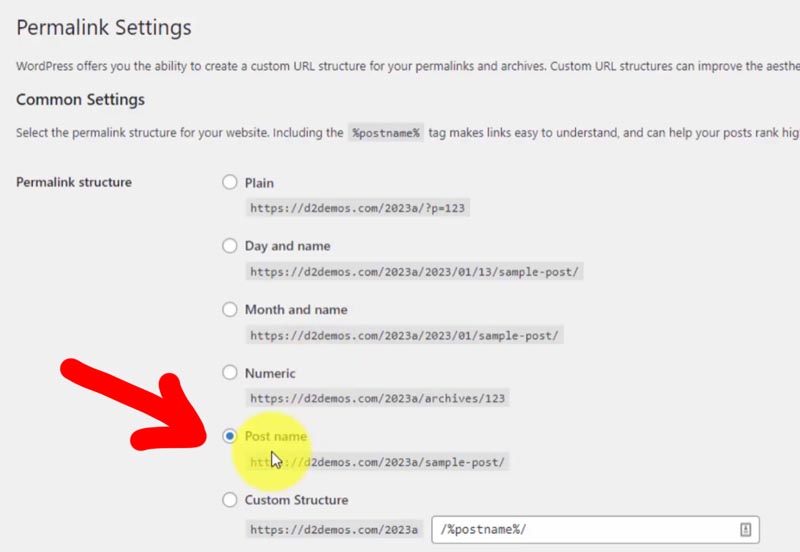
I always recommend that you set it to “Post name” as you’re setting up your website. Don’t change this after you start publishing content, otherwise, you might have links that don’t work anymore (and that will hurt your SEO).
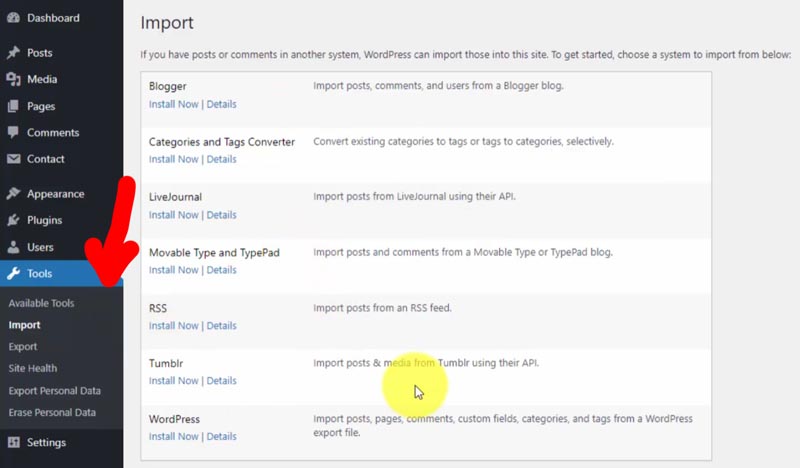
Additional WordPress Tools
Next, we have the tools section, which is useful for importing and exporting.
It allows you to import blog posts if you have them on another platform or another WordPress site. That will require you to install an importer plugin.
If you export your current site, it generates an XML file. Please note that this is not a full export of your entire website, including the design and layout. It only exports your post/page content.
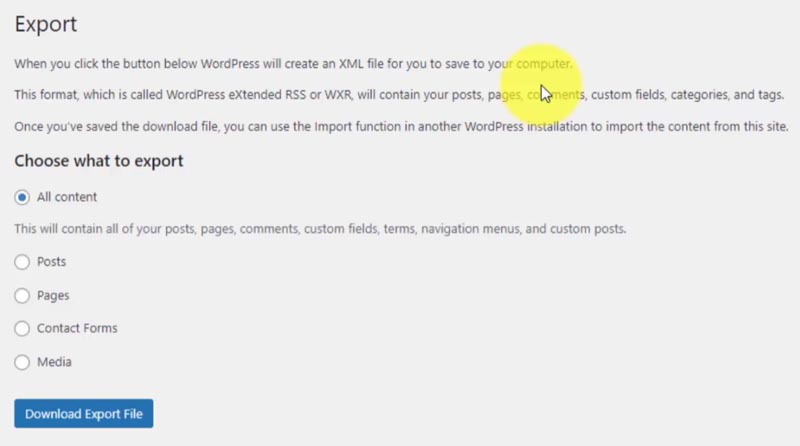
There are plugins available that allow you to do full site backups (like Duplicator), which essentially clone your entire website, including the design, media, and WordPress database (that’s where posts, pages and settings are stored).
Another great feature in this section is the Site Health option.
It shows you the details of your web server and highlights any issues. For example, it may recommend removing inactive themes like you see below.
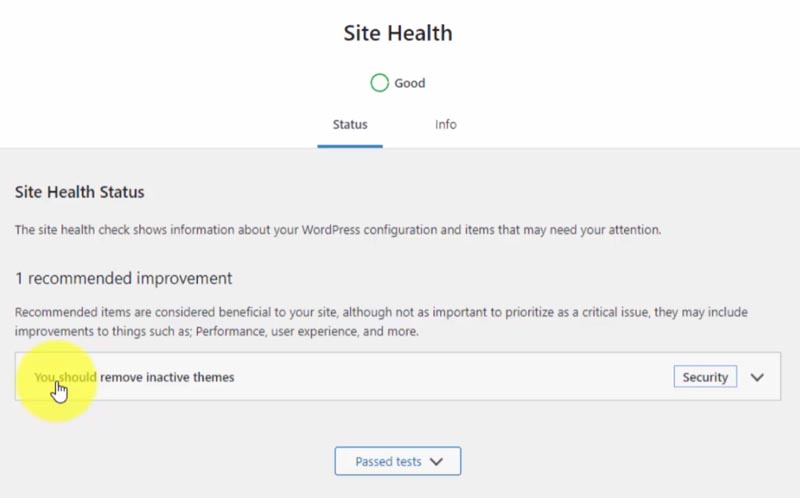
In the “Info” tab, you can see specific details of your installation, such as the time zone, home URL, and permalink structure, which we discussed earlier. Plus you can view the PHP information, including the PHP version, memory limit, and upload max file size.

These technical details are essential if you encounter errors, so you can debug the problem. Sometimes more complex themes require more powerful default PHP settings, or else they could crash.
If that occurs or you see messages in this Site Health section, please reach out to your web hosting support with the error and they should help to resolve it.
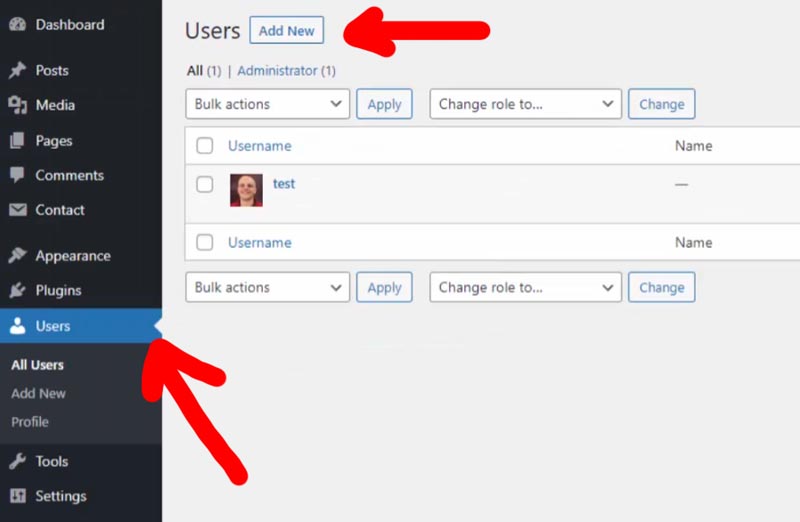
WordPress User Accounts
One of the great features of WordPress is the ability to create users at different access levels.
This means you can assign different roles and permissions to new users. For instance, you may have someone who can create blog posts but doesn’t have access to certain admin features.
WordPress is also popular for membership websites because there are plugins that integrate membership features and levels into WordPress user accounts.
This provides flexibility and customization options that make WordPress a preferred platform compared to others with limited built-in features.
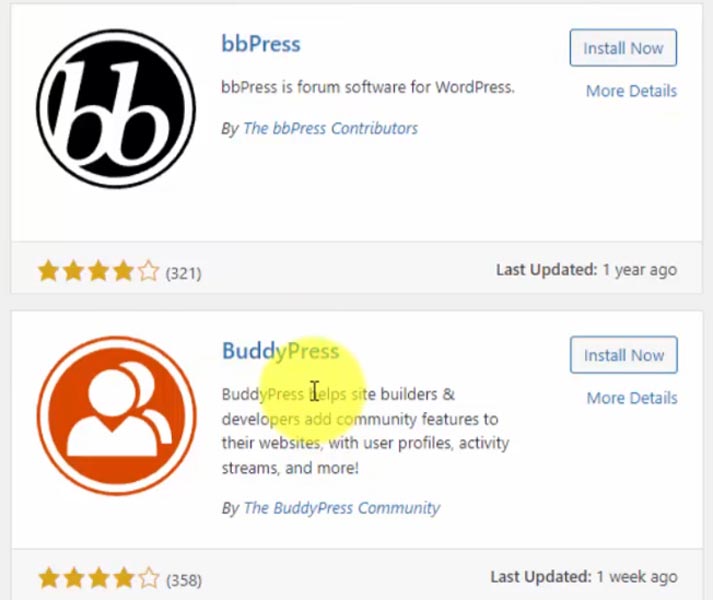
Pick Plugins to Add Functionality
Plugins play a vital role in extending the functionality of your WordPress website. If you encounter limitations while customizing your theme, chances are there’s a plugin that can fulfill your specific requirements.
One example of a plugin is Contact Form 7, which is a popular one for creating, you guessed it, contact forms.
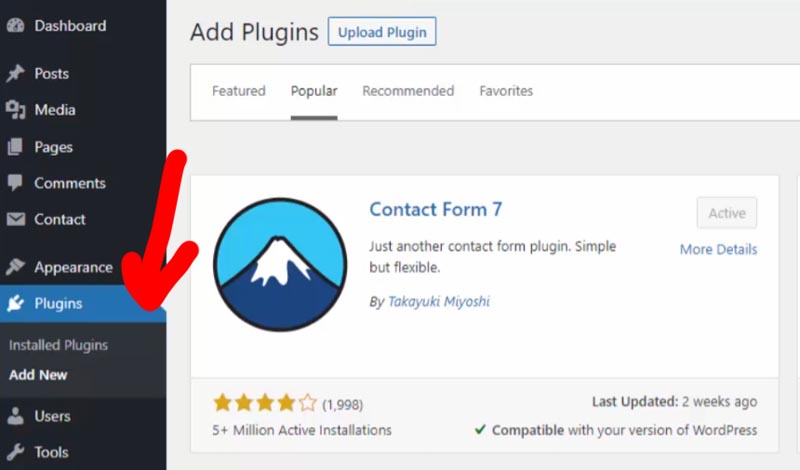
It adds a new menu item under the “Contact” section, allowing you to customize the plugin settings.
Now, let’s return to the Plugins page and click on “Add New” to explore the available plugins.
When selecting a plugin, it’s important to consider two key factors.
Firstly, ensure that the plugin is popular and widely used, as indicated by a high number of active installations.
Additionally, check the plugin’s rating to gauge its quality and reliability.
Take the time to browse through the plugins available. You can explore different tabs, such as “Popular,” where you’ll find plugins like Contact Form 7 and Yoast SEO, which I typically install on every website. The latter allows you to optimize posts and pages, improve their ranking on Google, and drive more traffic to your site.
Expanding with eCommerce
Another highly popular plugin worth exploring is WooCommerce. It empowers you to transform your WordPress website into a fully functional eCommerce platform, selling physical or digital products.
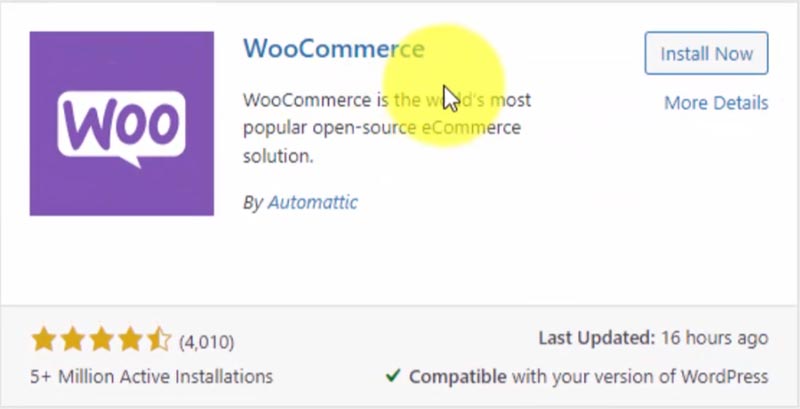
This is precisely what sets WordPress apart and makes it an exceptional choice. You don’t have to pay $30-50/month like other website builders and platforms to start with these powerful plugins.
By using the self-hosting method, you have the freedom to utilize the power of WordPress to customize your site according to your specific needs and preferences.
If you feel more confident in your WordPress skills after this tutorial, I encourage you to take action and dive right into creating your website today. The best way to learn is by actively engaging with the platform and experiencing it firsthand.
If you’re eager to get started immediately, visit HostGator using the link provided below or watch my step-by-step tutorial on launching WordPress with HostGator.
Launch with HostGator
Setup WordPress in minutes! 👇
Start NowI may earn a commission if you purchase using my links which helps support this website.